
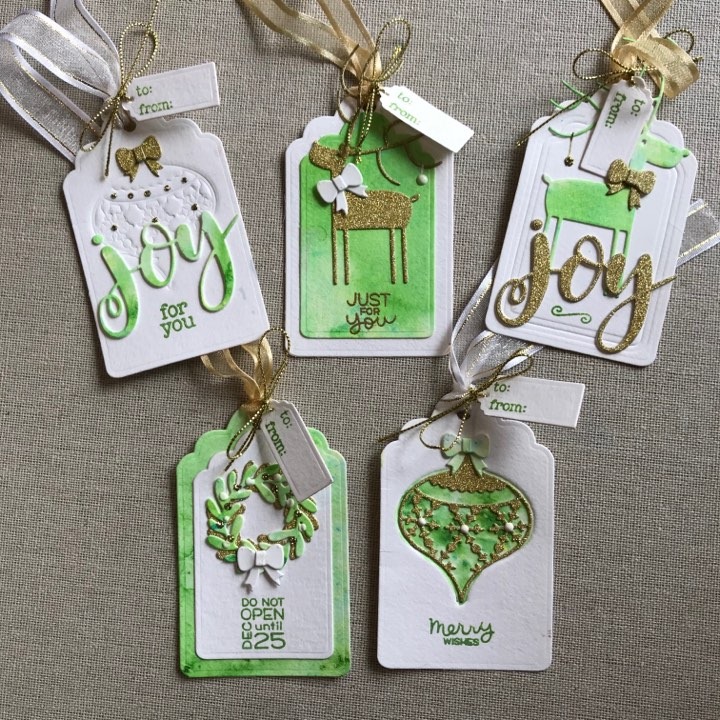

I taught a cardmaking class over the weekend, where 12 participants came along to Scrapbook Central in Petone to make a set of Christmas Gift Tags. The class was all about using dies to create beautiful impressions on cardstock rather than cutting, achieved by using a rubber embossing mat. Plus we had a bit of fun splashing and spritzing Nuvo Shimmer Powders!
Products we used:
- Spellbinders/Sizzix Rubber Embossing Mat
- Nuvo Shimmer Powders
- Watercolour cardstock
- Nuvo Glitter cardstock (gold)
- Memory Box Snowflake Ornament die
- Lawn Fawn Mini Wreath die set
- Lawn Fawn Tiny Tag Sayings
- My Favorite Things Deer Love die set
- My Favorite Things Joy die
- BoBunny Nesting Gift Tags die set
All products used in this class can be purchased at Scrapbook Central

Using dies to emboss rather than cut opens up so many possibilities! We used a nesting set of tag dies, and in the above photo, I am showing how embossing the smaller tag die gives a pretty frame on their gift tag which you can see on the tag below. To do this, you need to set up your die cutting machine as if you were going to use an embossing folder (Tab 1 on the BigShot, Plates A, B & B on the Cuttlebug). Place the rubber mat, cardstock and die (or dies) facing down between the plates and roll through.

In this extra example, I have used a Memory Box small circle burst die to emboss the cardstock and the Lawn Fawn wreath sits perfectly in the middle. This technique is great for your background dies, borders, frames, nesting die sets and even your image dies to emboss outlines to gently highlight your images.

You aren’t limited in which side you emboss either! Two tags were embossed using the front and back of the Memory Box Snowflake Ornament Bauble. This first one, we embossed the BACK of the die, painted the impression with shimmer powders and glued the die cut bauble into it. Because a die is always going to be slightly bigger than the actual cut out, you can use this technique for any of your symmetrical shaped dies (circles, hearts, snowflakes etc).

The same bauble die was sent through again, this time facing down and the intricate lines were embossed.

Below are a few more pictures of the day – you can see the ladies used different colours and combinations. Everyone went home with a set of five tags and a whole new outlook on their die stash at home!


As this was my very first class, I sent everyone home with a little gift bag (perfect for carrying gift tags!) and some sweet treats. I had a lot of fun, and a big thank you to Philippa at Scrapbook Central for having me! Also, a huge thank you to my mum for all the help getting this class underway!

Hey you got to the end of my first proper blog post! Well done! If you want to be in the know about future classes, markets and general how-to’s, please follow 😀
Well Chick it was good to see your face. Now I can imagine you when I look at your posts! I love the watercolour thing with the tags. It’s great being able to see examples of different techniques, not just being told about them. Good on you for taking a class. I think your students will be coming back for more. I live in the SI but my sister lives in Korokoro and bought my birthday present from Scrapbook Central. I think I’ll be visiting when I next fly up to visit.
Welcome to my page Trish – thank you for visiting! Scrapbook Central is well worth the visit in person too – Philippa is amazing. I hope to do more blog posts about techniques like that, so stay tuned.
[…] Last year’s Gift Tag Class held at Scrapbook Central, where we used Shimmer Powders and cute dies to create a set of gift tags. Plus, the Bonus blog post with further tags. […]
[…] Last year’s Gift Tag Class held at Scrapbook Central, where we used Shimmer Powders and cute dies to create a set of gift tags. Plus, the Bonus blog post with further tags. […]