
You can’t make a card without cardstock! Here’s how I store mine in my craft room.
Card Bases and Card Fronts
The cardstock I use the most is Neenah Classic Crest Solar White in both #110 and #80. It really is the most versatile cardstock in my craft room, and available from a couple of places with regular supplies – I have listed these retailers in my Cardstock article in my Best of the Basics series.
It is important to me that my white cardstocks are carefully stored, easily discerned which is which, and in a plentiful supply.


Firstly, I have a file holder with coloured L-shaped pockets, each labelled with the type of cardstock contained. These are my full sheets, of which I try to keep at least 10 sheets or so, whilst the rest is cut up into ready made card bases and fronts.
Also, in these L-shaped pockets, I keep my sheets of Vellum, Acetate, Stick-it Adhesive sheets, Yupo paper and the 160gsm white paper for my binders.

I have a box with dividers, full of my card bases and fronts, pre-cut, all ready to go. I use Neenah the most, so those are the largest sections.
I have sections for Watercolour paper, Tim Holtz’s Watercolour paper, Bazzill Marshmallow cardstock, Bristol Cardstock, Gina K Kraft, etc. Every so often, I have a cutting session and refill the box. This makes my crafting sessions so much easier, especially when finishing and getting that piece of art onto a card base.
Sometimes when I cut down my cardstock pieces, I have a bunch of strips left over. I pop them in a box, so I have a ready supply of sentiment strips, either for the sentiment itself, or for stacking them up.
The leftover strips are also super handy to use as ‘handles’ for embossing die cut or chipboard elements – simply adhere the element to one end with temporary adhesive. Hold the handle from the other end so you don’t burn your fingers with the heat gun, or get unsightly marks/dents from the tweezers.
Coloured & Specialty Cardstock
Most of my cards are made using white cardstock – but there are some seriously pretty cardstocks in rich colours which are hard to resist!
Given that many of these gorgeous coloured cardstocks are not particularly readily available, I wanted to ensure I didn’t waste the ones I have. I love that Krafters Cart are getting some of my favourites in more often, especially Gina K, as they don’t ship cardstock to New Zealand directly.
I know Stampin’ Up! coloured cardstock is easily attainable, but I find it a bit lightweight for my personal taste, and prefer to try and get the heavier weights, such as Lawn Fawn, Bazzill, Gina K and Hero Arts.
I have seen craft rooms with deep drawers filled with filing folders, holding cardstock – such a great way to store and easily access cardstock sheets. Some lucky people have beautiful paper shelves too – keep an eye out for stores selling off paper storage carts etc, sometimes you can score a bargain.
I don’t have such a drawer or shelf, so I decided to use plastic document wallets with zipper tops. Turns out they can be rather expensive! Kmart to the rescue again!

3 for $3! 
They even have a label pocket on the front! 
A beautiful rainbow!
What’s great about these, is they sit nicely on my shelf (in rainbow order even) and I can keep half pieces, or scraps within, with no fear of losing any (this is why I wanted the zip top). Also, being carefully labelled, I know exactly which cardstock I want to match up with a project, or order in again when I’m low.
Scraps

This is a little bamboo set of two drawers sitting in the top shelf of the cabinet behind me. I keep scraps of my good white and black cardstock in the top drawer – perfectly reachable when I want to quickly do a sentiment, or stamp/cut out a small image or something like that.
The second drawer holds scraps of the cheaper cardstock – the sort I would use to cut extra pieces for layering, scribbling, or some other messy thing I need them for.
Ahh, those teeny weeny pretty pieces! I currently have three places where I store my scrappy bits and inky papers.

I have a box file, and each divider is colour coded – I did this simply by glueing a piece of coloured cardstock folder over the black divider, now I can easily reach into the correct pocket.
The front half is in rainbow order, then I get into my gold and silver sections, and any patterned paper scraps.
These scraps are smaller than half sheets, are generally odd bits of cardstock that have been die cut in some way, or funny strips left over. I delve into this for cutting dies out for the fronts of my stamp/die storage envelopes – excellent way of using up scrap cardstock!
larger inky and alcohol inked background pieces are kept in a separate box as detailed below.

Often after a creative inky session, I end up with backgrounds left over.
I keep the larger pieces in a box, that is easily accessible and able to flip through. There are all sorts in this box – half finished pieces, ‘mistakes’, large pieces to cut down, finished backgrounds ready to make up into a card when I have the time and creative inspiration. If I’m lacking inspiration, this is the box I look through, to see if anything comes to mind.
I took this tip from Jennifer McGuire – she makes cards occasionally by using all her pretty off-cuts from previous cards – the ones where there has been inking, heat embossing, alcohol inking and the tiny strips are too pretty to waste. They’re also too small to find in my large box file!
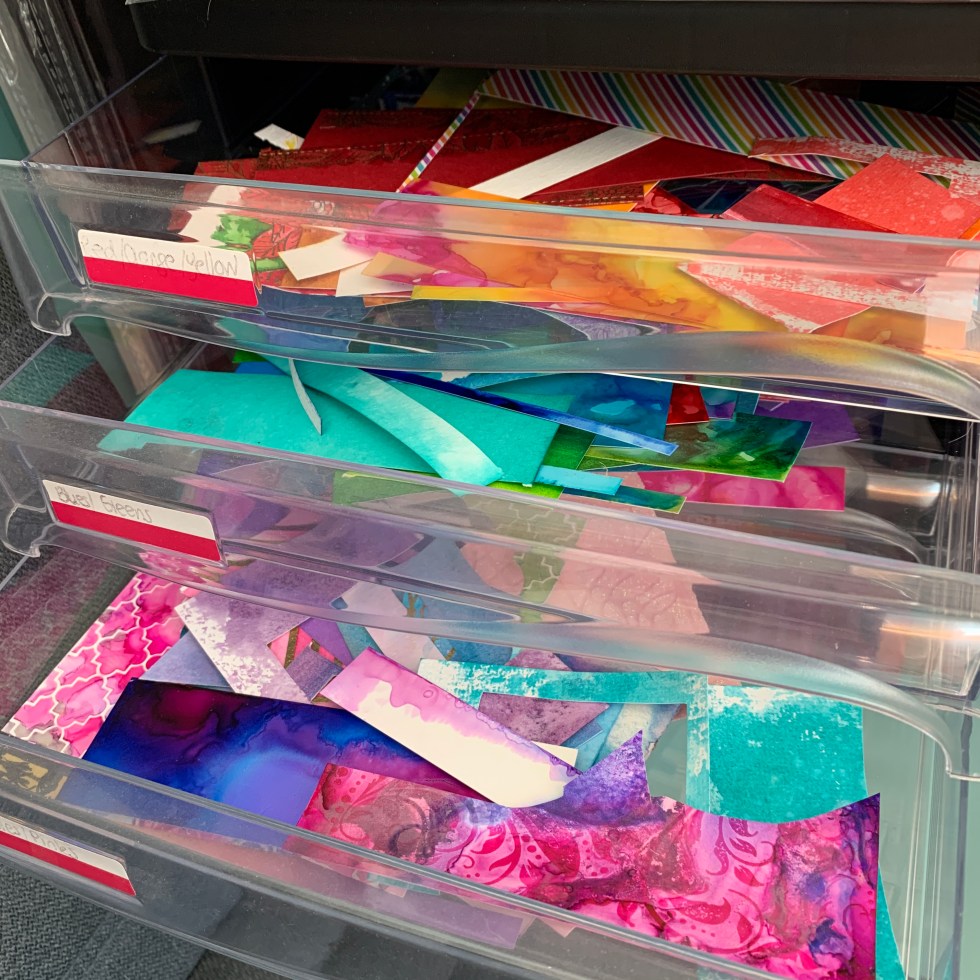
So I have this set of plastic drawers sitting in my shelf and I chuck my off-cuts into here, ready for when I want to have a go at creating something using scraps.
There are actually five drawers in this drawer set, and the fourth drawer holds my scrappy pieces of specialty cardstock – the glittery, shimmery, vellum type pieces that are too good to throw away. If I want to die cut a word or small piece, this drawer set is the first place I look.
Patterned Paper and 12×12 Papers
I’ll be honest here. I don’t have much patterned paper. I don’t generally purchase 12×12 size either as I don’t scrapbook. In fact, I have done a clear out and given away a stack to my daughter’s classroom – probably more than I have kept!

However, I do have a small amount, and they are stored in 12×12 pockets I purchased from Warehouse Stationery. Much like the coloured cardstock above, I like to ensure my paper packs are kept together, plus I can keep larger scraps and half pieces in the pockets too, without wasting too much.
I do have a small collection of 6×6 paper pads, mostly Doodlebug, and I have recently bought a bunch of the Memory Box 6×6 glitter pads. These are kept in a box on the shelf for easy access.
Check out places like Spotlight, Warehouse Stationery and your local craft store for 12×12 sized file folders, trays and even drawers to keep your patterned papers, DSP etc.
Tour my craft room – you can check out how I store my stamps & dies, inks, tools, cardstock and pretty colourful things too!
For more in-depth information about the best value supplies for your craft table, from cardstock to the handiest tools, check out my Best of the Basics series.
Thank you for visiting – I hope you have found the above information helpful in your card making journey and craft room organisation. Feel free to message me if you have any questions.
Follow me on my social media channels: