Posted on Leave a comment

Dapper Reindeer Gift Tag

You can find more of my Gift Tags from over the years by checking out #inkyandstampytags

I love the Simon Says Stamp Picture Book Reindeer – he really is a cutie. I featured this guy on a Christmas gift tag last year, and you can see that tag below too.

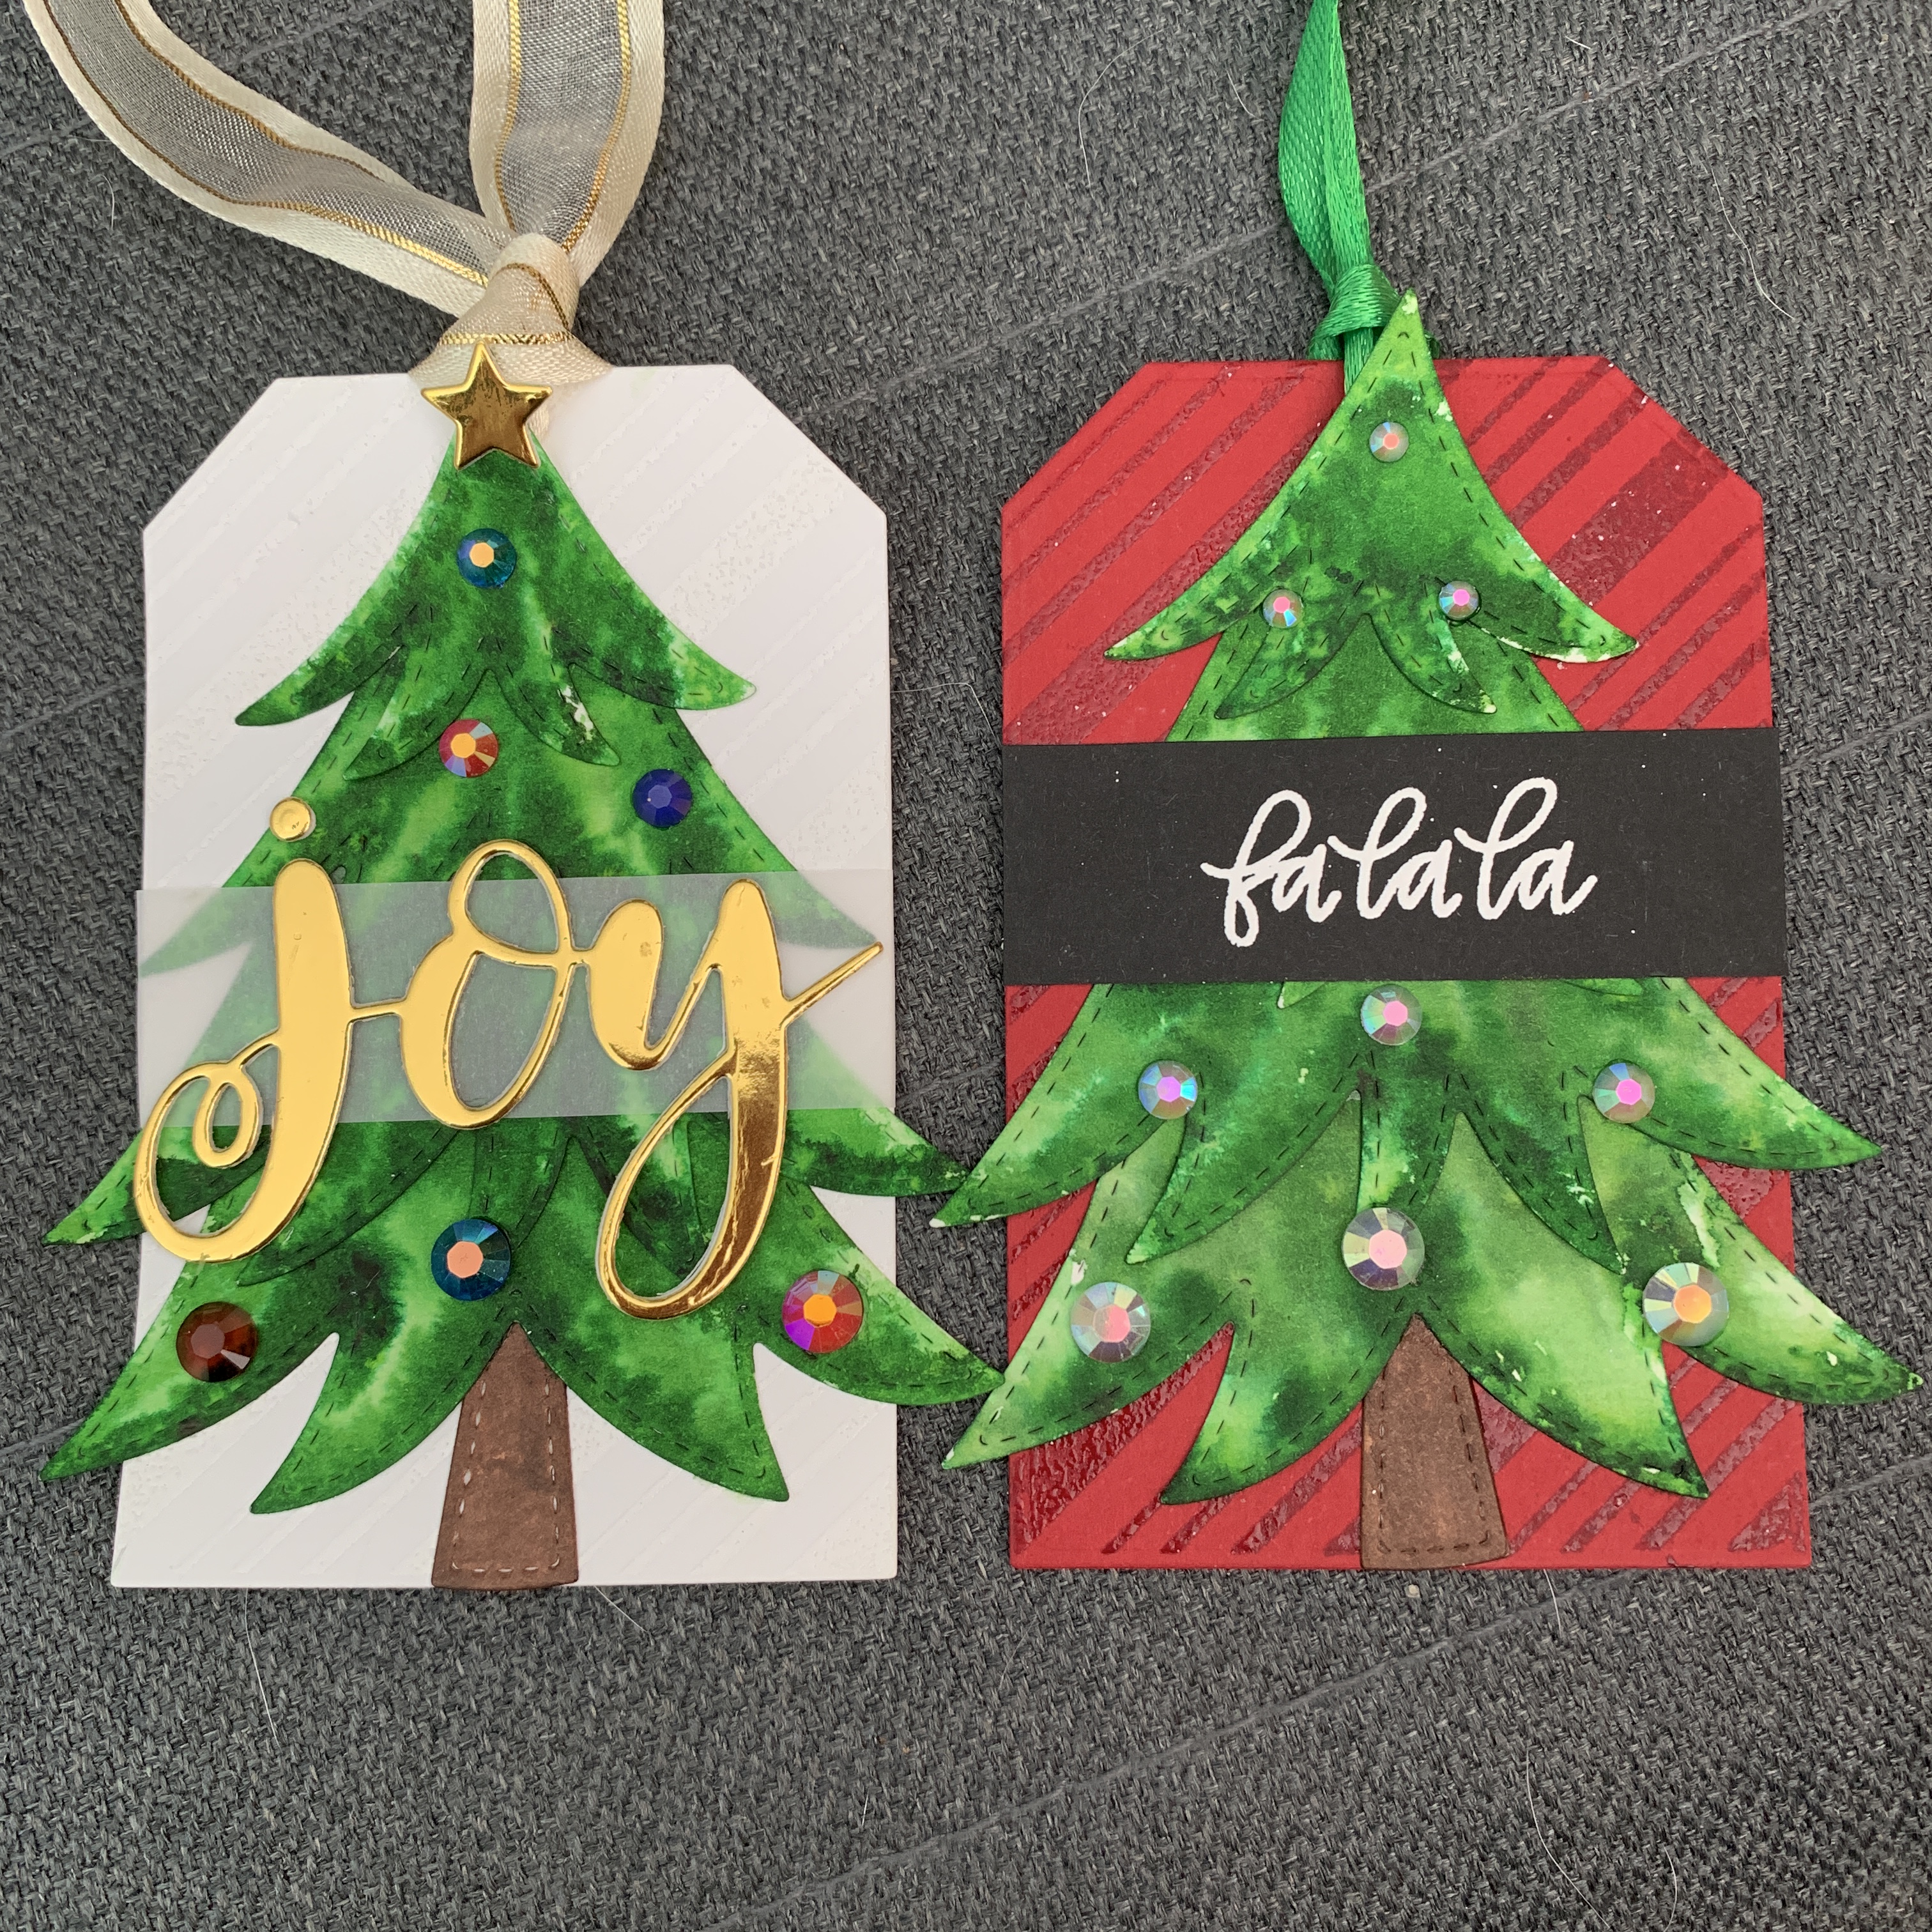
I cut out the tags from red cardstock, and the trees from green. PLEASE NOTE: The Hero Arts Paper Layering Pine Tree used here is discontinued, but I have linked a similar shaped tree below.

I coloured the trees using Copic Markers, flicking the colour from dark to light to give the tree some depth and texture. I then cut them all in half, straight down the middle.

Copics used for the Trees: G29, G09, G05.

I lined up the straight edge of the trees onto the edge of the tag, and heat embossed the sentiments in place. You can see I am using both halves of the tree, so no waste of any of my colouring efforts!

I gold heat embossed the little sentiments on either side of the tag, just to the side of the lower part of the tree.

I also liberally sprayed the tag with Gold Shimmer spray.

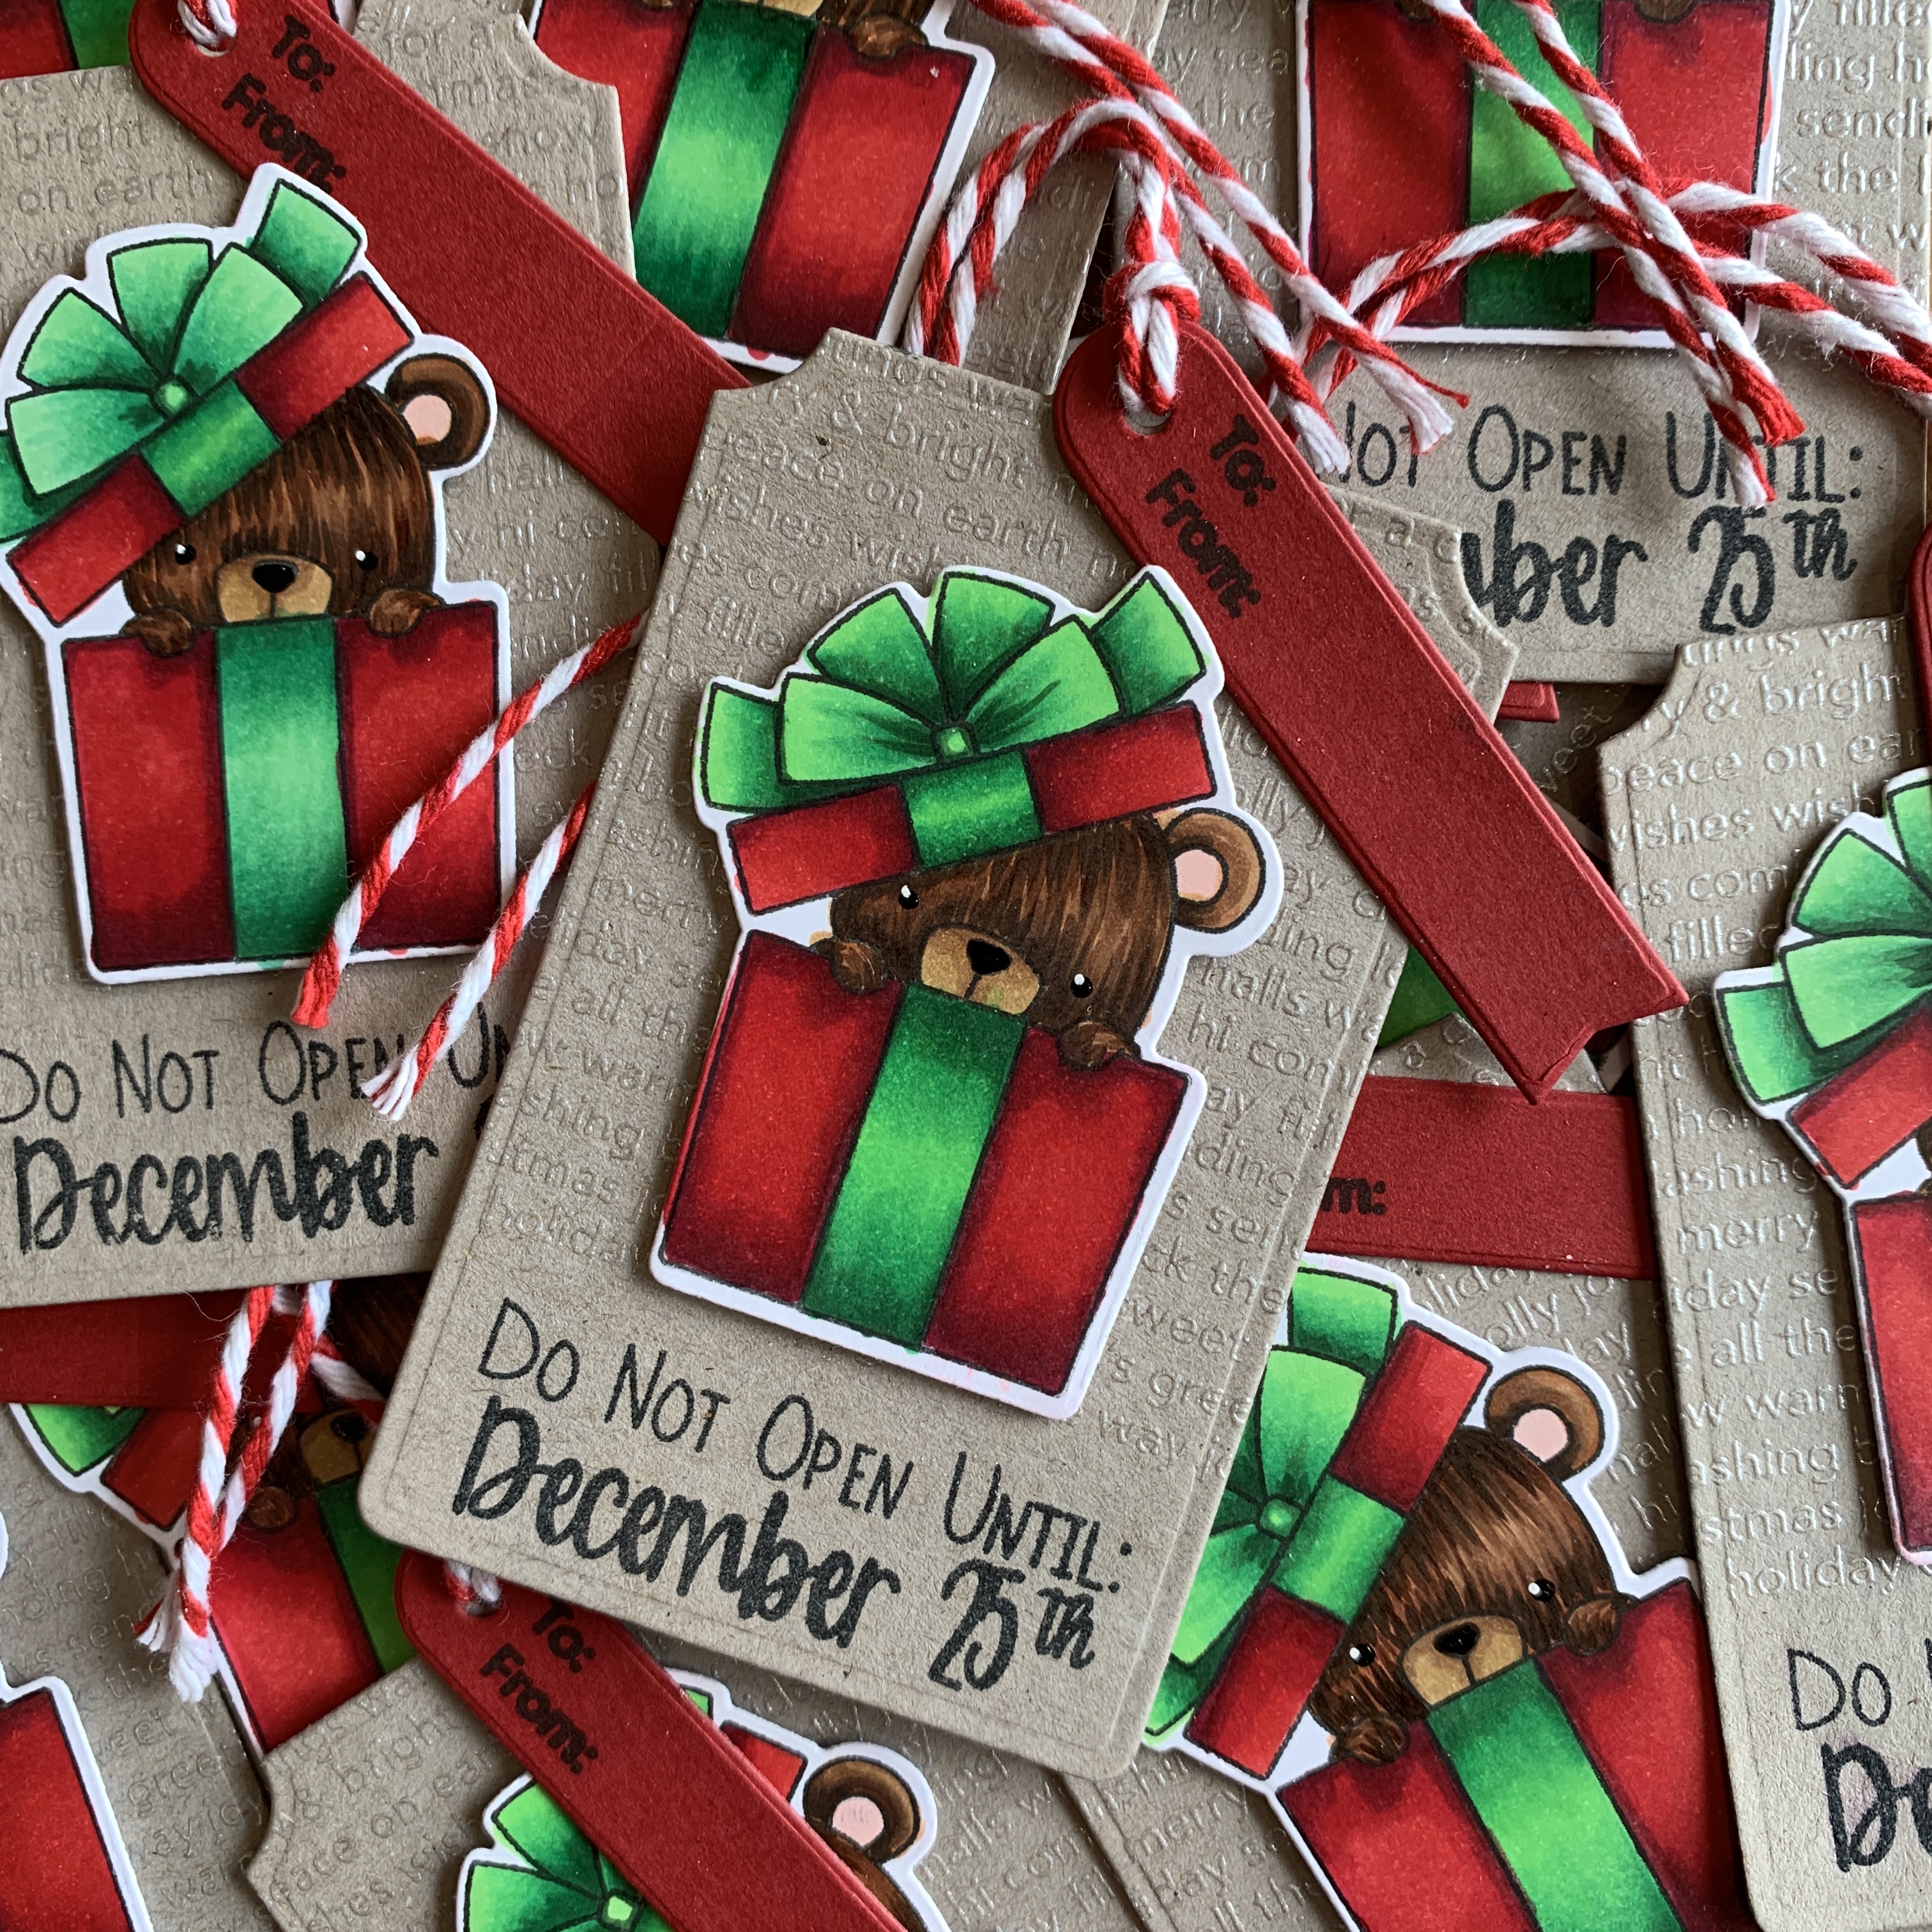
I cut and coloured the reindeer one at a time. One of the features of the Picture Book dies is that they cut all the pieces at once, although the antlers are a separate piece in this case.

Copics used for the Reindeer: R59, R57, R55, R30, R20.

The banner is from an older My Favorite Things Tag set, and I cut and glued the folds together and stamped the To & From on them. I used the banner as a guide for placement of the first part of the reindeer body and built him up from there in the centre of the tag. Once the reindeer was glued down, the banner was fixed in place right at the bottom.

I added black glaze pen to the eyes and nose details, along with Nuvo Ivory drops to the tree for beautiful baubles. I thought he looked a little underdressed, and the scarf in the reindeer die set wasn’t working for me (we have summertime Christmases here in New Zealand), so I found some tartan patterned paper and created a little bow tie.


The Picture Book Reindeer was featured on one of my gift tags last year too.

The tag is a Concord & 9th gift tag from the Sprinkles Turnabout set, cut from same red cardstock. The reindeer is also coloured with Copics and built the same way from the bottom of the tag. The little snowflakes (CZ Design) are white heat embossed to make a hand stamped background.

The Ho Ho Ho sentiment is from an old Stampin’ Up! set.

This completes my gift tag today. Thank you for stopping by! Below are links to the products I have used – some are affiliate links (not all) which simply means I may get a small commission at no extra cost to you when shopping. Thank you for your support – it means I can keep creating and sharing with you.

https://linkdeli.com/widget.js?id=f5e8378456858c916708

You can find more of my Gift Tags from over the years by checking out #inkyandstampytags

Follow me on my social media channels:

Posted on Leave a comment

Christmas Tree Gift Tags

You can find more of my Christmas Gift Tags from over the years by checking out #inkyandstampytags on Instagram, or my dedicated Pinterest board

I love the rich colour and impact of these gift tags! I’m sure they’ll catch the recipient’s eye from under the tree very effectively 🙂

I cut out all the pieces for the trees from watercolour cardstock and handpainted each piece with Ken Oliver ColorBurst watercolor powders. It sounds like a lot, but it probably took a couple of hours to get through all the pieces.

I tried to make the colour darker towards the top of each piece to give shadows and depth. I simply coloured the tree stump with a brown copic marker (E57). I used thin double sided adhesive to put the tree pieces together, just a thin strip at the top of each piece, plus I glued the tree stump to the bottom.

The tags were heat embossed using the Hero Arts Candy Stripe Background Stamp – white heat embossed on the white tag and clear heat embossed on the red tag.

I glued the trees down onto the tag, with the tree stump aligned to the bottom of the tag. I left the very top of the tree unstuck, so I had room to add ribbon later.

I cut Vellum strips at 3/4″ to stretch across the tree centre and stuck down on the back with thin double sided adhesive. You can leave that part visible, or add a gift card pocket to the back which hides that bit to some extent.

I cut the MFT Joy die out of both gold mirror cardstock and scrap and glued two layers together. I wanted just a little dimension on the die cut as I felt it just looked better.

For the red tag, a black 3/4″ strip was cut and the sentiment white heat embossed and simply glued down onto the tree.

I decorated the trees with gems from Pretty Pink Posh – bright colours for the white tag plus a gold star, and iridescent gems and pearls for the red version. The tree on the white tag has a star cut from the mirror gold cardstock on top. Gold and green ribbon added to the top finishes these tags off nicely.

This completes my gift tag today. Thank you for stopping by! Below are links to the products I have used – some are affiliate links (not all) which simply means I may get a small commission at no extra cost to you when shopping. Thank you for your support – it means I can keep creating and sharing with you.

https://linkdeli.com/widget.js?id=f5e8378456858c916708

You can find more of my Christmas Gift Tags from over the years by checking out #inkyandstampytags on Instagram, or my dedicated Pinterest board

For more in-depth information about the best value supplies for your craft table, from cardstock to the handiest tools, check out my Best of the Basics series.

Follow me on my social media channels:

Posted on Leave a comment

Ho Ho Ho!

I took inspiration from Catherine Pooler herself for these cards! I am particularly in love with the Vintage Bauble background stamp and it was a ‘must have’ for my stash.

I stamped, coloured and cut the images from ‘Man with the Bag’

Copics Used: R59, R29, R27, R24, C3, C1, C0

I added extra details to the hats with a gold gel pen, plus the Radiant Amplify which puffs up amazingly! I love adding it to pom poms, fluffy tails etc, and it really adds fun dimension to the stamped elements.

For the background pieces, I used Gina K Red Velvet cardstock, and a concrete grey cardstock I particularly like, found at my local stationery store – I have provided a link below if you’re interested.

The background is simply tone-on-tone heat embossing – stamp the Vintage Baubles background stamp with Versamark ink and use clear embossing powder. It darkens the original colour of the cardstock and provides a nice gentle pattern without being too overbearing. For extra sparkle, I could have used sparkly embossing powder, or Hero Arts White Satin Pearl, but I didn’t think of that at the time.

The Ho Ho Ho is a Honey Bee Stamps die, and is part of a larger set of Christmas sentiments – I really like the delicate font, plus a shadow die is included for each of the sentiments in the set. I cut the shadow once out of white, and the words were cut three times with the top layer cut from black sparkle cardstock. These were stacked together which gives a really nice dimension. The hats and beards were lifted using foam tape.

I used the largest Lawn Fawn Outside In Stitched Rectangle from the set to make a white panel for the coloured panel to sit upon. The stitching gives a nice finishing touch. The cool thing about the Lawn Fawn Outside In range of dies is that the stitching is embossed on both sides of the cut – giving you a stitched frame/window, and the stitched rectangular (or other shape) piece. Excellent value for money!

The entire panel was then placed on the front of the Neenah #110 card base.

This completes my card today. Thank you for stopping by! Below are links to the products I have used – some are affiliate links (not all) which simply means I may get a small commission at no extra cost to you when shopping. Thank you for your support – it means I can keep creating and sharing with you.

For more in-depth information about the best value supplies for your craft table, from cardstock to the handiest tools, check out my Best of the Basics series.

Follow me on my social media channels:

Posted on 1 Comment

A Beary Christmas Tag

You can find more of my Gift Tags from over the years by checking out #inkyandstampytags

Each year I like to make Christmas Gift Tags as gifts for teachers and other support people important to our family.

I actually stamped and die cut these bears last year, intending to create a tag for my 2019 collection – but creator’s block got in the way! So I sat and stared at them for months. I had coloured just the bears thinking inspiration would come, but every tag idea, colour combo, sentiment match, just didn’t do it for me. So they sat in the box and I told myself this was OK. Didn’t make it any less stressful :/

It’s interesting what a difference a year makes in terms of crafting skill and ideas! I was disappointed with my bear colouring efforts from the year before and had a go at re-colouring them. As a result, I have ended up with darker bears than I’d usually like, so I paired them with deep rich red and emerald green tones for the gift box. The following photos show you which Copic markers I used.

The tag itself was masked off with a strip of post-it tape along the bottom, and I heat embossed the MFT Christmas words background stamp in White Satin Pearl embossing powder.

I stamped the sentiment along the bottom of the tag, and popped the bear on top with foam tape.

I added Glaze details to the eyes and nose of the bear to finish them off.

I added a further mini tag from the MFT Tag Builder 5 with a To & From and tied the two tags together with red and white thick Baker’s twine.

Such a simple tag after a full year of agonising!

This completes my cute gift tag for today. Thank you for stopping by! Below are links to the products I have used – some are affiliate links (not all) which simply means I may get a small commission at no extra cost to you when shopping. Thank you for your support – it means I can keep creating and sharing with you.

This completes my little gift tag today. Thank you for stopping by! Below are links to the products I have used – some are affiliate links (not all) which simply means I may get a small commission at no extra cost to you when shopping. Thank you for your support – it means I can keep creating and sharing with you.

https://linkdeli.com/widget.js?id=f5e8378456858c916708

You can find more of my Gift Tags from over the years by checking out #inkyandstampytags

For more in-depth information about the best value supplies for your craft table, from cardstock to the handiest tools, check out my Best of the Basics series.

Follow me on my social media channels: