Posted on 1 Comment

Awesome Reindeer Gift Tag

You can find more of my Christmas Gift Tags from over the years by checking out #inkyandstampytags on Instagram, or my dedicated Pinterest board

Warning! Contents of this blog may be awesome! I loved the sentiment included in the Taylored Expressions Spoiler Alert stamp set, and knew I needed to create a tag with it.

I started by colouring and cutting out a bunch of Gerda Steiner’s mischievous reindeer on Copic X-Press it cardstock. He will sit towards the top of my tag.

Copics used: E59, E57, E55, E34, E31, R27

I used the Gina K Designs Delicate snowflake background stamp, white heat embossed and splashed with Ken Oliver Ultramarine Blue ColorBurst powder. I love the vivid, bright blue result this gives.

I’ve made other tags using this same background stamp and colour combo before, and I’ll share them below.

It is much easier to die cut all the tags first, then stamp, heat emboss and paint them, rather than trying to get as many gift tags cut from one 6″ square piece of cardstock. Mass production means you can actually stamp two tags at a time, which doesn’t take long at all.

I stamped and gold heat embossed the sentiment a bunch of times on vellum. Because I was making quite a few tags at one time, it was easier to simply stamp and heat emboss them all at once.

I simply trimmed the sentiment strips with my trimmer and the two ends are folded around to the back of the tag and secured with strong double sided adhesive tape. Any excess is carefully trimmed off. I didn’t add any extra backing to my tag, you may wish to in order to hide the vellum more completely.

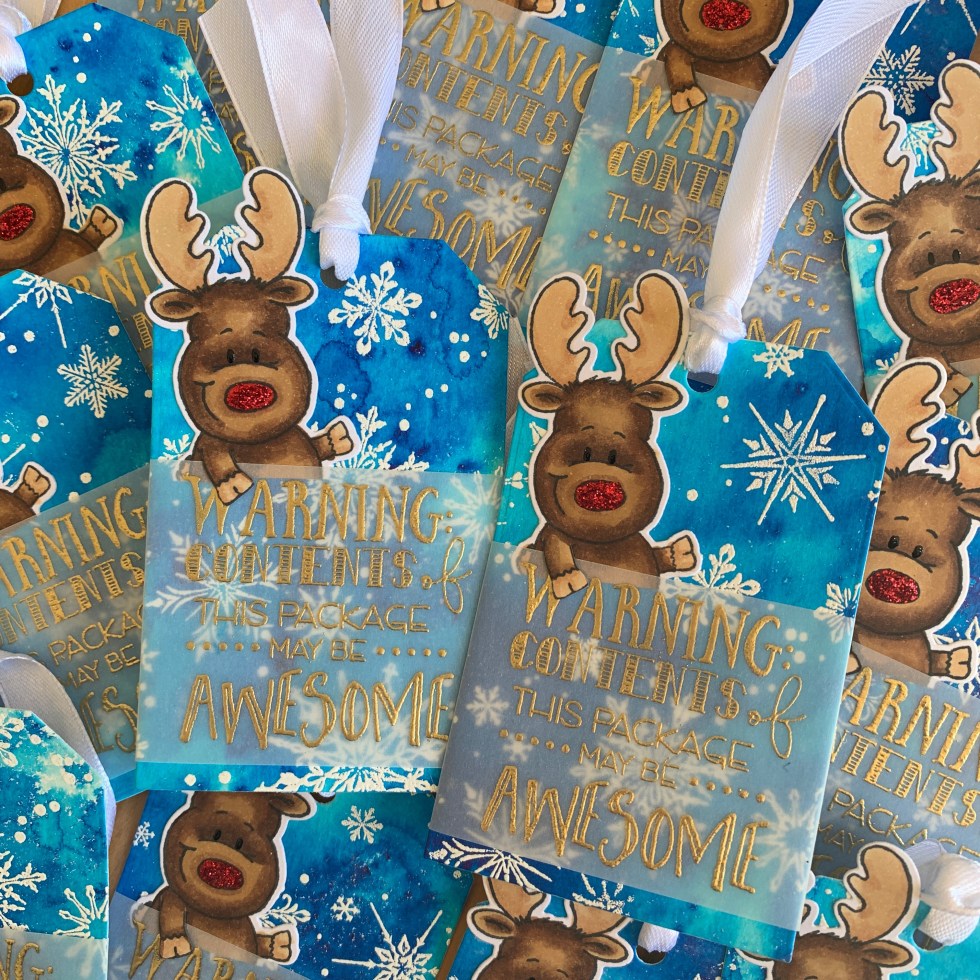
The cute reindeer is trimmed down to fit, plus I cut around his arm so it hangs down over the vellum sentiment a little.

I added red glitter stickles to his nose for added shine and sparkle.

This completes my awesome gift tag today. Thank you for stopping by! Below are links to the products I have used – some are affiliate links (not all) which simply means I may get a small commission at no extra cost to you when shopping. Thank you for your support – it means I can keep creating and sharing with you.

https://linkdeli.com/widget.js?id=f5e8378456858c916708

For more in-depth information about the best value supplies for your craft table, from cardstock to the handiest tools, check out my Best of the Basics series.

You can find more of my Christmas Gift Tags from over the years by checking out #inkyandstampytags on Instagram, or my dedicated Pinterest board

Follow me on my social media channels:

Posted on 3 Comments

Cute Hedgehog Gift Tag

You can find more of my Christmas Gift Tags from over the years by checking out #inkyandstampytags on Instagram, or my dedicated Pinterest board

Last year I made many many gift tags – and as a result, I have a box full of little projects that never came to fruition. This is one of those. I had stamped and cut the hedgehogs using Copic X-Press It cardstock, and coloured the hats, but that’s as far as I got :/

Inspiration hit finally! I decided to go with a Kraft and rich red colour scheme. I used scraps I had in my craft room from my local stationery store, but Gina K or Lawn Fawn cardstocks would be comparable and I have linked to those at the end of this post.

I chose the MFT Treat Tag because the hedgehog is quite a large image. I wanted to frame him somehow, and decided on the delicate frame in the Concord & 9th Just Because die set.

To get the gold heat embossed background in the right place, I created a mask tag out of scrap cardstock by cutting the frame out where I wanted it placed. I used my little MISTI to stamp and heat emboss the MFT background stamp, Christmas Words.

I completed colouring the hedgehog images – copics used are:

  • Red: R59, R29, R27, R24
  • Green: G28, G09, G05, G14
  • Grey: W9, W7, W5, W3, W0
  • Skin: E21, E00, E000

To feature him in the frame, I carefully fussy cut out the stocking up to his fist, and trimmed the bottom of the stamped image off. It now sits flush directly on the bottom of the red frame.

Before adhering the framed hedgehog to the tag, I added fluff to the hat with Tsukeniko Radiant Neon Amplify in White – a very effective puffy paint! This stuff puffs up tremendously when heated with the heat gun and STAYS white, giving a lot of dimension.

I glued the frame to the tag, where it fits over the gold heat embossing perfectly

For the finishing ribbon, I added a wide red ribbon found at my local emporium store. It has No Peeking printed on it, and I thought the tone suited the cute image. I used gold ornament cord to secure the wide ribbon, and tied it in a bow.

Finally, the To and From is stamped at the bottom in black, and this stamp is from the Scrapbook.com Gifting and Tag Sentiments – there are three other To & From stamps to use on other gift tags too, plus some other fun sentiments designed for gift tags.

This completes my little gift tag today. Thank you for stopping by! Below are links to the products I have used – some are affiliate links (not all) which simply means I may get a small commission at no extra cost to you when shopping. Thank you for your support – it means I can keep creating and sharing with you.

https://linkdeli.com/widget.js?id=f5e8378456858c916708

You can find more of my Christmas Gift Tags from over the years by checking out #inkyandstampytags on Instagram, or my dedicated Pinterest board

For more in-depth information about the best value supplies for your craft table, from cardstock to the handiest tools, check out my Best of the Basics series.