Posted on 2 Comments

Ornate Floral Cards

When I saw this die in the new PinkFresh Studio release, I just knew I wanted to play with it. It takes a little longer to receive the newest goodies here in New Zealand, but I don’t mind being a little late to the party!

Here are the two cards I made today

Let’s start with the green card. I was aiming for a monotone look, and almost got there! I started with Lawn Fawn Peacock cardstock for the card front, and white Neenah for the remaining die cutting.

I cut it out a couple of times from white cardstock to start with, and glued a white frame to the Peacock card front. I built up the flowers a little by adding the white petals beneath the coloured ones – I think I ended up cutting it out three times in the end for this first card.

I then coloured the flowers I wanted with the other die cut, while all the pieces were still together. I find this makes it quite a bit easier to see what I’m colouring, I can do it quite messily and not worry about getting ink where I don’t want it. To keep the die cut pieces altogether and secure whilst colouring, I did use some strips of purple tape and post it tape.

I realised I wanted the leaves to have some depth of colour, to differentiate from the coloured card base a little. I cheated here, and coloured directly onto the card base with copics (BG78, BG49, BG09). As it was impossible to keep that original white die cut frame from getting inky bits on it, I ended up glueing a second white frame on top, and building up the flower petals again.

Copics used for the petals: BG45, BG13, BG10, BG000.

I added the coloured petals on top – and the depth and interest I achieved was pretty good!

I used my Nuvo glimmer gloss pen to add shimmer to the uncoloured parts of the card front and adhered it to a Lawn Fawn Mermaid card base.

To finish the card, I die cut the word Hello from Altenew three times, including one in silver, and stamped the sentiment from the Altenew Statement Flowers. I wondered about shortening the strip, but decided it looked good extending right across the card. I added ivory iridescent gems to the flower centres, plus a few extras scattered about, and this completes my card.


Rainbow Ornate Floral Card

Well, after I finished the first one, I immediately wanted to do another! This time, I wanted to try out more colour – a rainbow.

I used the remaining frame (complete with post it and purple tape strips) from before to do my colouring – I may just keep a frame in the envelope with the set for future colouring, just because it seems handy.

I went around from red to yellow, blue to purple and green for the leaves. The copic colours I used are:

  • Red: R59, R29, R27, R24
  • Yellow: Y38, Y17, Y15, Y13
  • Green: G28, G09, G05, YG07
  • Blue: B23, B32, B12, B00
  • Purple: BV08, BV04, BV13, BV02

I adhered a frame to a white card base and inlaid the green leaves directly. The flowers have a couple of extra petal layers beneath the coloured ones and I really like the subtle difference in depth.

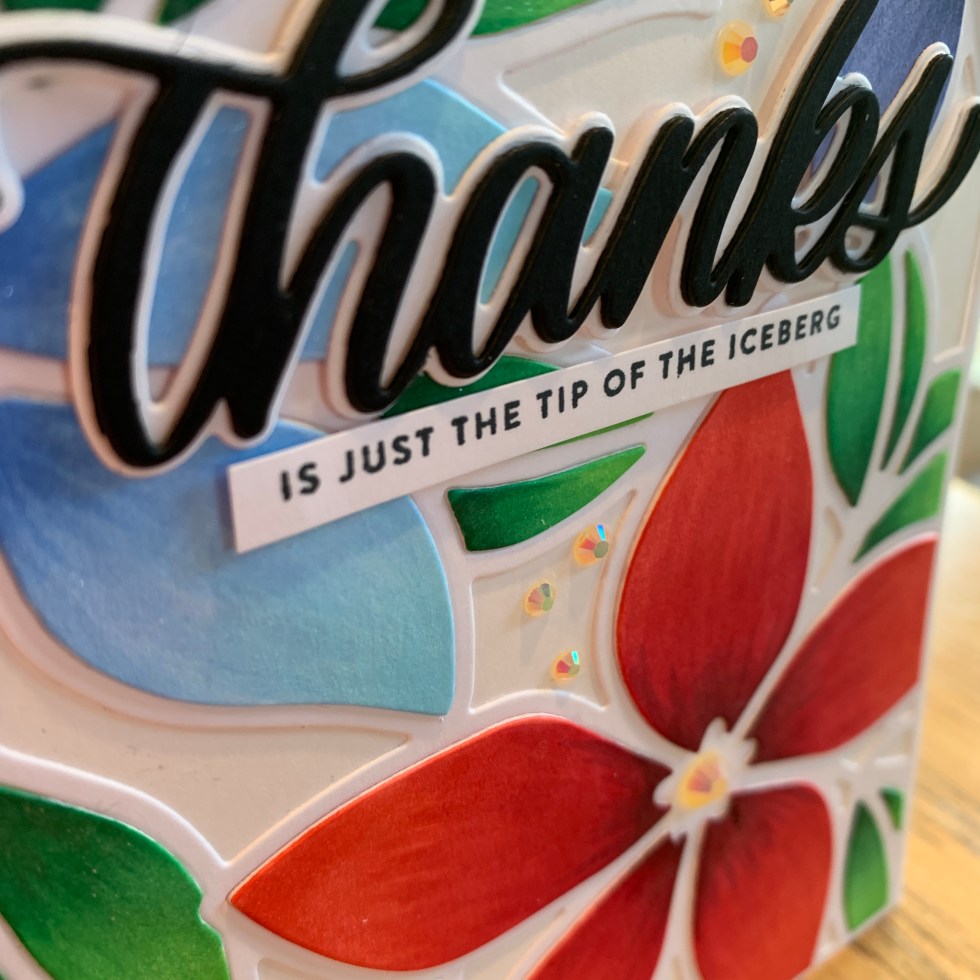
I finished off the card with a Simon Says Stamp Thanks sentiment – white shadow layer and two black layers for the intricate word die. I did use a Nuvo Black Glitter cardstock for the top layer for added sparkle.

Plus, a little sentiment strip, gems in the flower centres and little extra gems scattered around the Thanks.

This completes my pair of cards today. Thank you for visiting! Below are links to the products I have used – some are affiliate links (not all) which simply means I may get a small commission at no extra cost to you when shopping. Thank you for your support – it means I can keep creating and sharing with you.

Also, I have another post using the same Ornate Floral die where I created a beautiful shaker card here.

https://linkdeli.com/widget.js?id=f5e8378456858c916708

For more in-depth information about the best value supplies for your craft table, from cardstock to the handiest tools, check out my Best of the Basics series.

Follow me on my social media channels:

Posted on Leave a comment

A Cheeky Birthday Wine

It’s a good friend’s birthday (Happy Birthday Jo!), and I am celebrating her with a cheeky wine – both in my glass, and on this card!

I was inspired by a cute layout from Marieke Slaats featuring a wine glass shaker, and wanted to create something along similar lines.

Supplies: (please note some affiliate links used whereby I may earn a small commission when you shop at no extra cost to you).

I white heat embossed the background stamp – this is just a small stamp, which doesn’t actually cover the entire card front, but perfect for a party backdrop. For information and instructions on how to Heat Emboss, click here.

I then masked off the bottom fifth of the card front using Post-It notes, and inked above them using Distress Inks and a Tim Holtz mini inking tool with foam, covering the heat embossing we’ve done in the previous step with ink. I used the Vintage Photo at the bottom, Wild Honey in the middle and Fossilized Amber towards the top, going dark to light. Buff the embossed image with a rag or cloth to remove excess ink from the confetti, this makes the embossing look nice and crisp.

The wine glass die set makes it very easy to create a quick shaker with the matching pouches. My Favorite Things have a great variety of pouch shapes to suit various dies they have in their collection.

You can see the confetti sitting in the pouch

I cut the wine glass twice, and heat embossed one of them a couple of times using Ranger Liquid Platinum embossing powder. I glued them together, and glued the shaped pouch in the middle.

I placed a little pile of confetti carefully on the card in the area I wanted to place my glass, and carefully glued the glass down with liquid adhesive – the confetti can now be shaken about in the pouch.

For shaker cards and windows, you can use tiny punched shapes, glitter, beads, buttons, sequins or microbeads in the shaker pouch – whatever you happen to have on hand.

A close up of the little fox and the birthday sentiment.

I stamped with Gina K ink, coloured and cut the cute critters from the Stacey Yacula Sending Sweet Celebrations stamp set – the fox carrying a gift, the cake and the banner, which I cut down to fit the top corner of the card. I popped them on the front of the card and used foam tape for dimension.

I was flicking through my sentiments, and stumbled across the Taylored Expressions Big Grump – he has some brilliantly snarky sentiments, and this one fits perfectly with the theme of the card.

I stamped the sentiment along the bottom uninked area with Versafine Black Onyx ink. This is a pigment ink, and I like to use clear embossing powder to set it. Once the embossing powder is heated and melted, it gives a glossy black printed finish to the sentiment. I have had much better success using this ink and clear embossing powder technique than with black embossing powder directly – I always manage to get dots of black embossing powder everywhere which is disappointing at this stage of the card making process!

Now for the shiny finishing parts!

Nuvo Crystal Glaze
Shimmer Spray – available in Gold, Silver, Sparkle and Shimmer
Radiant Amplify – a liquid that fluffs and puffs when heated with a heat gun

I added sparkle to the card using Tsukineko shimmer spray, and shine to the cake and banner with Nuvo Crystal Glaze.

The party hat has a little fuzzy pom pom on top created with Tsukineko Radiant Neon Amplify – you put the liquid where you want it, and use your heat gun to make it fluff right up – such a FUN little detail, and perfect for pom poms, clouds, fluffy hats and scarves, bunny tails, beer foam, I could go on……

I like to use a piece of white kids craft foam between my card base and card front, for flat, smooth and even dimension. It’s far cheaper and more effective than screeds of foam tape! I buy mine from Lincraft online, and I have sometimes found it at Emporium type shops too.

That completes the card! Thank you for reading this far – I’d love to know if you give this a go too.

If you have any questions regarding the putting together of this card, please feel free to message me – I’m only too happy to help!