Posted on 5 Comments

Red & Pink Color Hues Color Challenge

Red and pink! Not a pair of colours I would immediately think to pair together, but that’s all part of the challenge I guess!

I know February is usually the month of Valentine themed cards – hearts and flowers easily lend themselves to red and pink tones, but I thought I would challenge myself even further by choosing not to follow those themes. Plus, I am still in need of a bunch of birthday cards as my boxes are critically low.

I also want to quickly congratulate my friend Julie – she won the Red & Grey Color Challenge and is a guest designer for this one! You can see her brilliant Red and Pink card here.

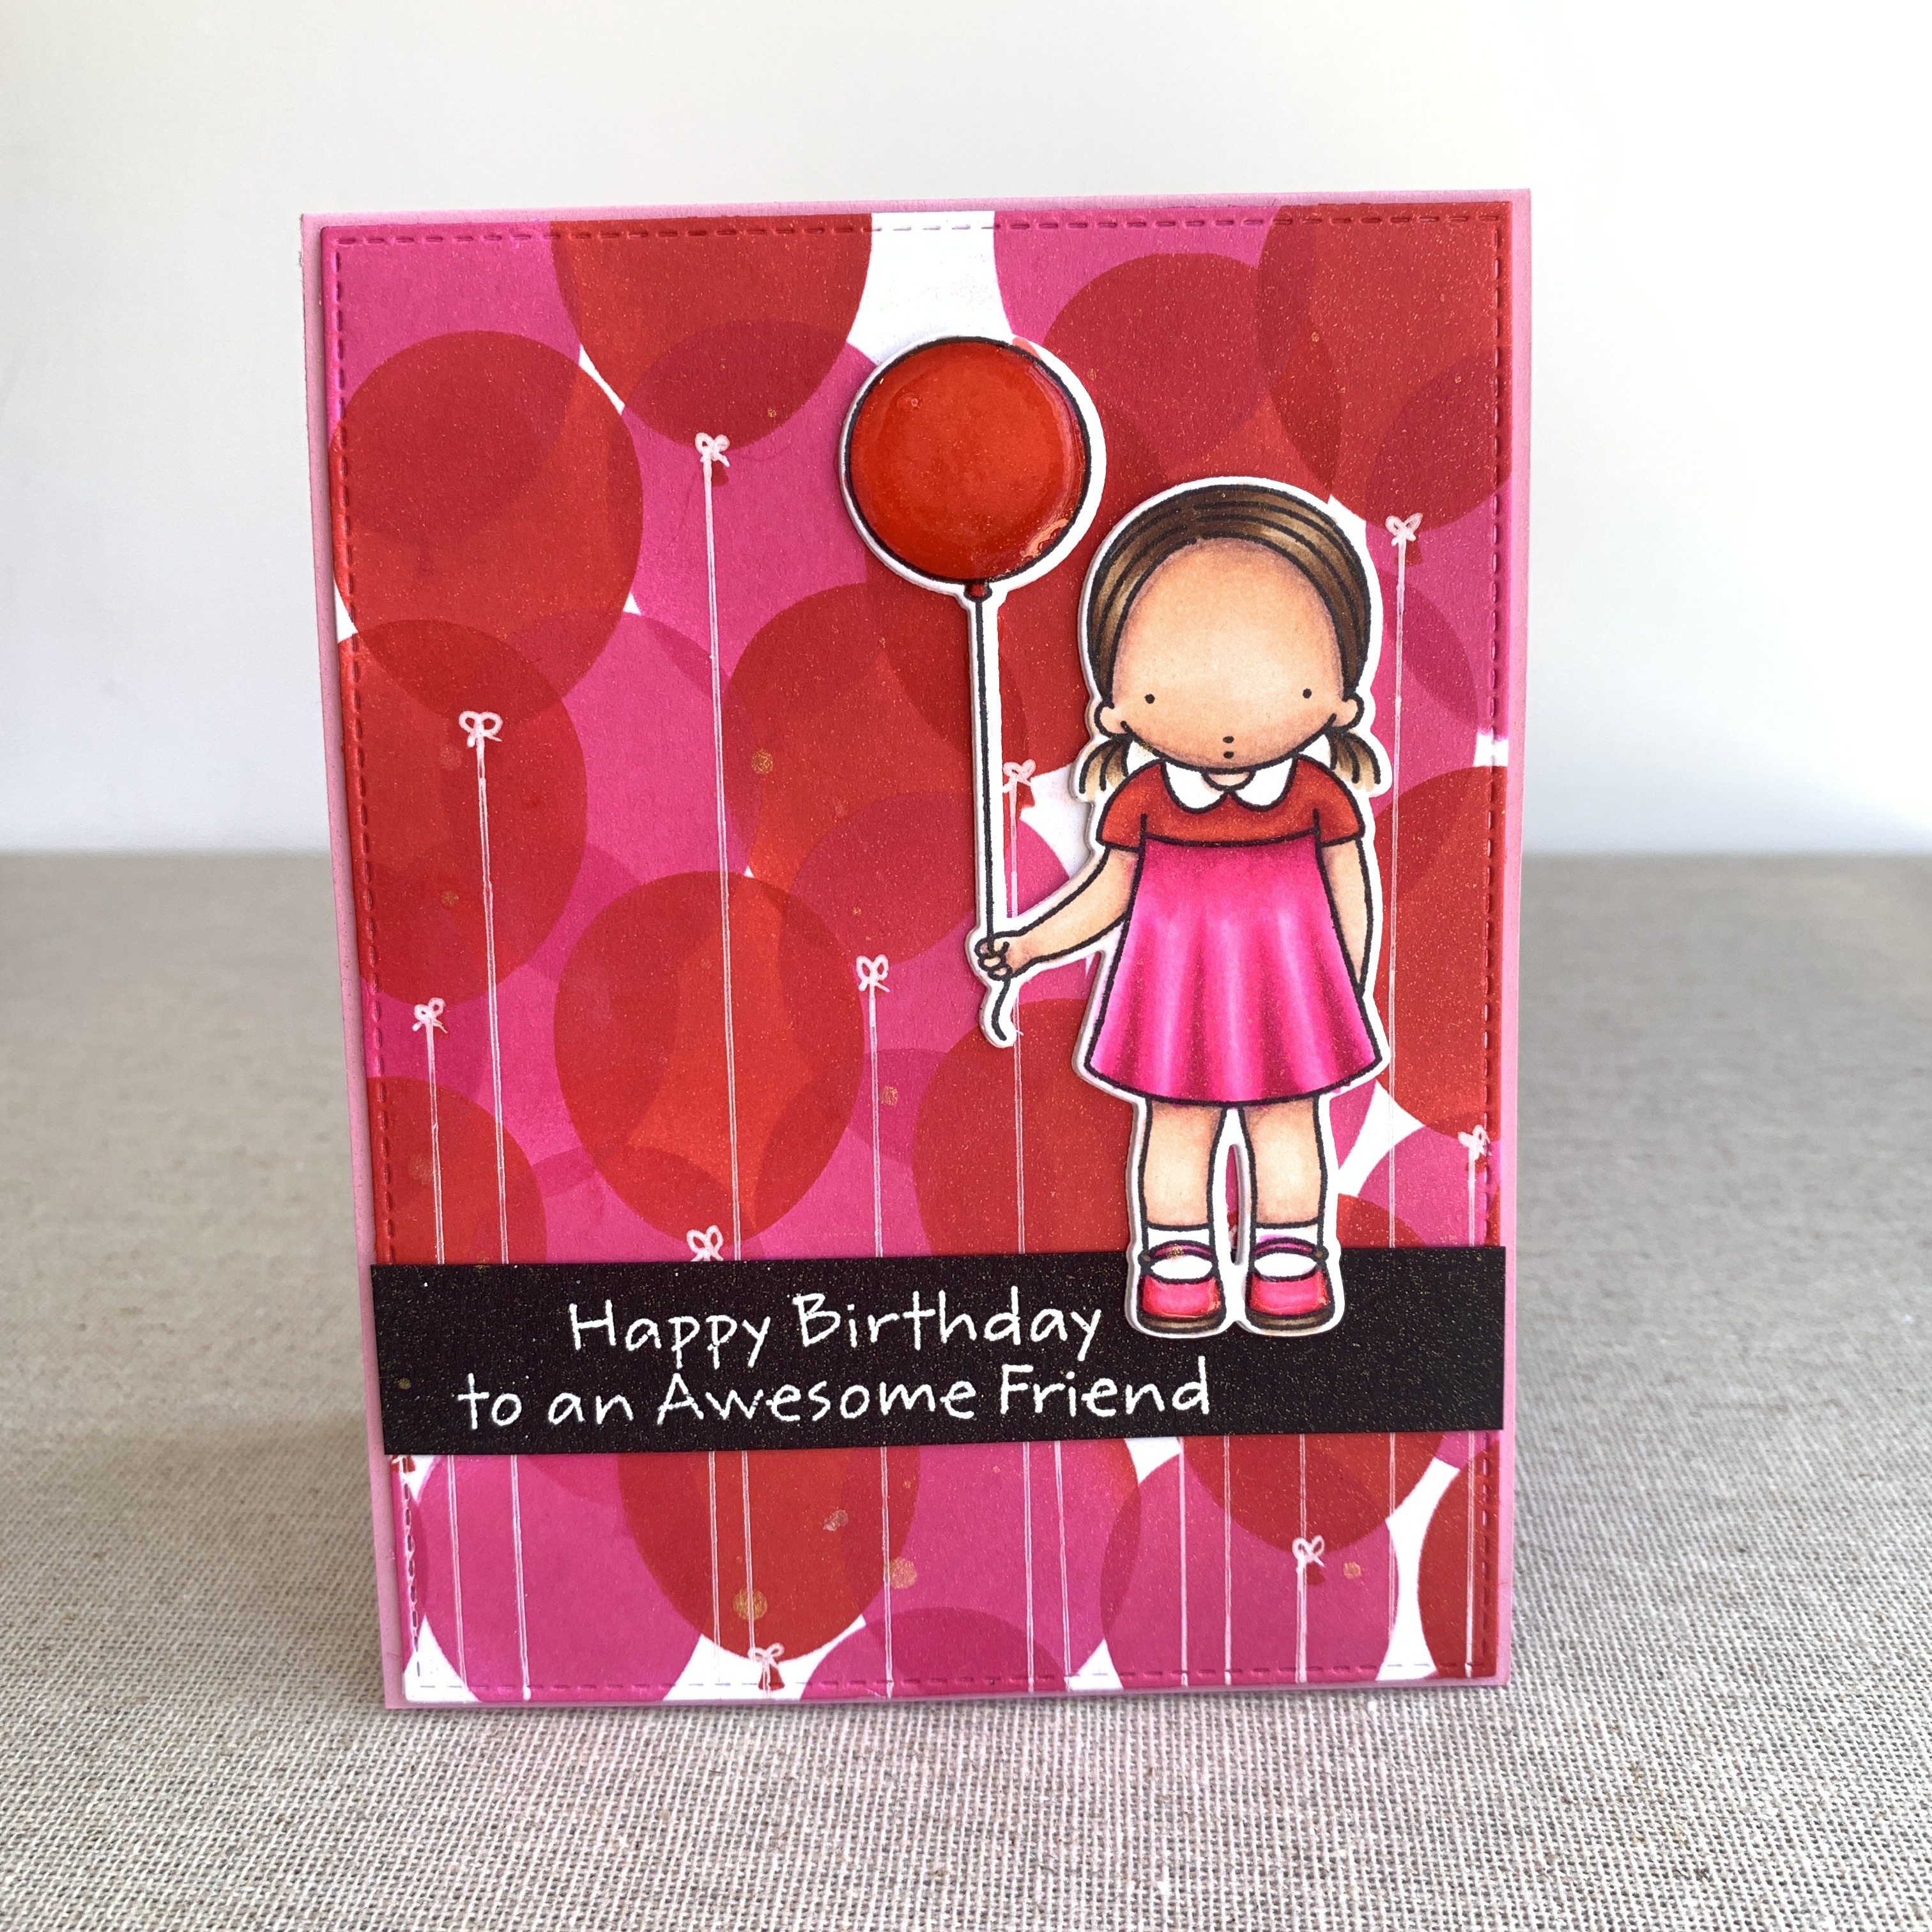
OK. So, I thought balloons would work! I used the Neat & Tangled balloon stencil which is unfortunately discontinued. (I have linked to another balloon stencil below which is similar). I used Distress Inks in Picked Raspberry and Festive Berries and inked up a BUNCH of balloons to pretty much cover my card piece. I ruled lines from some of the balloons down to the bottom as balloon strings with a white gel pen.

I cut the panel with a My Favorite Things stitched rectangle die, and also sprayed it with a bit, well, a lot, of gold shimmer spray.

I stamped and coloured a little girl from the My Favorite Things Birthday Besties set – giving her a pink and red outfit, coloured with Copic Markers. I also added a little shimmer pen and glaze to her shoes and her own balloon for shine.

I cut the image out using the matching die, and I also cut two more from scrap cardstock and stacked them together for a little dimension – this actually turned out to be faster to do than finding foam tape!

The sentiment is from the same stamp set, which I white heat embossed onto a strip of black cardstock to stretch across the card front. The card base itself is Gina K Designs Bubblegum Pink – keeping it in theme too!

This completes my Color Hues Color Challenge today! I have links below to some of the products I have used, some are affiliate links (not all), which simply means I may get a small commission when you shop at no extra cost to you. Thank you for visiting my blog today, I hope you join in with the challenge too!

This completes my card today. Thank you for stopping by! Below are links to the products I have used – some are affiliate links (not all) which simply means I may get a small commission at no extra cost to you when shopping. Thank you for your support – it means I can keep creating and sharing with you.

For more in-depth information about the best value supplies for your craft table, from cardstock to the handiest tools, check out my Best of the Basics series.

Follow me on my social media channels:

Posted on Leave a comment

Friendly Zebras!

Oh boy, did I have fun with this card! It’s my first slimline card too!

When I saw the colours listed for the new MFT Color Challenge 157 – Teals and particularly Browns, my first thought was ZEBRAS!

Why would the colour brown inspire a zebra? I used to have a cross stitch pattern of a beautiful, realistic zebra head. Of the eight different thread colours listed, all were shades of brown and ecru. No black and no white listed in the pattern!

Now, I don’t have any slimline sized stamps, dies or stencils, so the slimline challenge of the MFT Sketch Challenge provided an extra set of parameters to find my way around.

I started by creating my card base from Gina K Designs Kraft cardstock and cutting the front panel to fit. My card measures 3.5″ x 8.5″.

I also stamped my zebras with Catherine Pooler Icing on the Cake brown ink. I decided to add extra shading with my Copic Markers – I used E49, E59, E57 and I also used a little W3, W1 and W0 in the white areas for extra depth. R20 and R00 for the noses and ears.

I coloured the little scooter with BG49, BG45 and BG553, W9, W7 and W5. I used a little Nuvo Crystal Glaze on the scooter for extra shine at the end.

I cut three circles, using Hero Arts Infinity Circle dies from Hero Arts Arctic cardstock – I played with these to work out my final placement. I thought it would be fun to have a shaker element in the middle, so I traced the middle circle with a pencil, so I could tell where I wanted to cut through my card front piece.

I used an Echo Park Camping Leaves stencil and Hero Arts Unicorn White pigment ink for the background – this is a 6×6 stencil, and I simply moved it down after the first bit of inking and matched the leaves to continue the pattern, thereby filling the entire card front.

Unfortunately, I can’t find a link for this exact stencil, but you could use just about anything you have in your stash.

I wanted the top and bottom circles to be a little more interesting and I played with stitched hills, stamped flowers and all sorts before I settled on clear heat embossing an Echo Park Mini Flowers small background stamp, then inked the entire circle with Peacock Feathers distress ink – the clear heat embossing resists the ink being laid down, and you can still see the original colour of the Turquoise cardstock beneath. After you’ve inked, rub the piece with a dry cloth, this cleans all the ink off the heat embossing for a tidy and impactful look.

The bottom circle has simply been clear heat embossed, the top has been inked and dry buffed. Such a cool look!

The Shaker Part

For the shaker, I taped two Hero Arts circle dies together and cut three little frames out of Gina K Designs Turquoise Teal cardstock, plus I cut a circle out of some scrap acetate for the window. I glued one frame to the top of the acetate and two to the bottom. Set this aside until the end.

I covered the back of the card front panel with foam tape, ensuring the circle opening was fully encircled with tape to prevent confetti escaping. I placed the top and bottom ink resisted circles and trimmed off the excess. I placed a plain Arctic circle into the shaker compartment.

Now there’s a gap that needs to be filled with pretty Nuvo confetti (Turquoise Stars and Rose Gold Squares), plus I added some Distress Glitter dust. I glued the acetate lid on top, securing the confetti and glitter, and they can move freely about. You could add buttons, beads, sequins, die cut shapes, anything you want.

Finishing

I had fun placing my little zebras using foam squares and glue, and adding extra flowers and butterflies. I used Honeybee Stamps alphabet set to make the word Hi. This is cut from the Hero Arts Arctic cardstock and stacked three times. I used Nuvo Glimmer pen to add sparkle to the letters, and I put a layer of crystal glaze on top for shine.

I also used the sparkle pen on the zebras (I forgot that the Catherine Pooler ink is not designed for watercolour so the brown ink smudged a little, but it turns out I liked the effect as it took away the stark white of the zebra). I used my Copic markers to smooth this out too.

I white heat embossed Friend from Concord and 9th’s Say Hello stamp set onto a scrap of chocolate brown cardstock and glued it to the top of the Hi.

I added black glaze pen to the eyes, and white glaze pen to make trails for the butterflies.

This card is being entered into three different challenges:

My Favorite Things Wednesday Sketch Challenge 524

My Favorite Things Color Challenge 157

Simon Says Stamp Monday Challenge – Shake it Up!

This completes my card today. Thank you for stopping by! Below are links to the products I have used – some are affiliate links (not all) which simply means I may get a small commission at no extra cost to you when shopping. Thank you for your support – it means I can keep creating and sharing with you.

For more in-depth information about the best value supplies for your craft table, from cardstock to the handiest tools, check out my Best of the Basics series.

Follow me on my social media channels:

Posted on 4 Comments

MFT Sketch Challenge – 523

Happiest of Birthdays

I think I have managed to sneak this card into this week’s My Favorite Things Sketch Challenge at almost the very last minute! I have been working some other cards using this particular stamp set this past week, and I decided to use it again while it was on my table to create this card.

I stamped the Flowers in Bloom on watercolour cardstock and had fun painting them using Nuvo Shimmer Powders.

The colours I used are Cherry Bomb, Violet Brocade, Blue Blitz, Atlantis Burst. I squeezed a little powder into a watercolour palette pan, and picked up the colour with a wet paintbrush. A very easy way to watercolour!

I spritzed the panel with a little shimmer spray and some white gouache splatter.

The Sketch Challenge was set out with four panels to the bottom right of the card and a sentiment strip. Rather than colour four different images, I cut my panel into four – carefully removing a strip from the vertical centre and then horizontally on each of the resulting panels – all the while ensuring the image was not distorted. Many pencil marks and ruled lines on the back of this!

I die cut a further stitched rectangle to mount the pieces back together with foam tape for a little bit of gentle dimension.

The card base itself is Strathmore Bristol Smooth cardstock – it is a warm creamy colour and I find it matches very well in tone with the watercolour cardstock I use. You can also use Tim Holtz watercolour paper which is a much brighter white which matches with Neenah cardstock much better.

I felt the card base itself needed a little lift, so I white heat embossed a large background stamp, Flower Fields.

This gives the card a little interest without detracting from the focal image.

I heat embossed a sentiment, using Happiest of Birthdays from the More Essential Sentiments set and placed the strip towards the bottom right. A few wee Studio Katia pearls finishes off this pretty card.

You can enter this week’s Sketch Challenge too – click here to visit the My Favorite Things blog with all the details.

If you’ve never shopped directly with MFT before, you can click here to get $10 USD off your first purchase!

This completes my pretty card today. Thank you for stopping by! Below are links to the products I have used – some are affiliate links (not all) which simply means I may get a small commission at no extra cost to you when shopping. Thank you for your support – it means I can keep creating and sharing with you.

For more in-depth information about the best value supplies for your craft table, from cardstock to the handiest tools, check out my Best of the Basics series.

Follow me on my social media channels:

Posted on 6 Comments

Color Hues Challenge – Red & Grey

I’m always a bit slow when it comes to entering card challenges – last year I think I only entered ONE! I will try to do better this year hahaha.

I noted a friend had entered a card in this Color Hues Challenge and I was inspired to try it out for myself. Red and Grey – couldn’t be too difficult right? Well. 5 different things cut out, coloured, inked etc and I was no closer to completing a single card than when I started!

You can enter here too – this challenge closes on January 14, 9am (EST)

Hello Friend Card

I finally settled on this – a card using the Simon Says Stamp layered stencil set. The stencil set is so cool, I saw it featured on Jennifer McGuire’s blog and promptly ordered it – and of course it has sat in my stencil box for over a YEAR without being used! So this challenge fulfils another of my personal challenges, to USE my stash.

I started off with Gina K Designs Soft Stone cardstock, which is a soft, pretty grey. I used my cute little Concord and 9th mini inks in both Poppy and Cranberry for the flowers, Hero Arts Unicorn White Pigment ink for one of the leaf stencils and Silver Glacier paste for the other leaf stencil. I used Nuvo Red Glimmer paste for the berries layer. I was really happy with the final result. I cut down the panel to around 4″ x 5.25″.

To finish, I stacked the Gina K Designs Hello die a few times, inking up the top layer with the Concord and 0th inks again, added shimmer and a generous layer of Nuvo Morning Dew crystal drops for shine. This is placed on a strip of Platinum Vellum stretched across and a little sentiment from Simon Says Stamp Tiny Words.

I felt it needed a little lift with a darker grey, and I used Lawn Fawn Narwhal as a mat layer behind, which is then adhered to the card base.

Birthday Card

I was still having a play with the colour way, and ended up creating this fun birthday card using the MFT Birthday Cake die set.

I cut the pieces out of red, grey and white cardstocks and played out with it until I had it in layers that I liked. I created a panel with Gina K Designs Soft Stone cardstock, heat embossed with the MFT Numbers background stamp and placed on a darker grey cardstock. This time, I used a cardstock from my local stationery store, called Wrought Iron.

The big Birthday is from Hero Arts and I die cut it and stacked it a few times with a black glitter layer on top. The tiny Happy Birthday is from the Simon Says Stamp Tiny Words Birthday set. The card base is a dark red, Gina K Designs Red Velvet.

This completes my Color Hues Challenge today. Thank you for stopping by! Below are links to the products I have used – some are affiliate links (not all) which simply means I may get a small commission at no extra cost to you when shopping. Thank you for your support – it means I can keep creating and sharing with you.

Follow me on my social media channels:

For more in-depth information about the best value supplies for your craft table, from cardstock to the handiest tools, check out my Best of the Basics series.