Posted on 4 Comments

MFT Sketch Challenge – 523

Happiest of Birthdays

I think I have managed to sneak this card into this week’s My Favorite Things Sketch Challenge at almost the very last minute! I have been working some other cards using this particular stamp set this past week, and I decided to use it again while it was on my table to create this card.

I stamped the Flowers in Bloom on watercolour cardstock and had fun painting them using Nuvo Shimmer Powders.

The colours I used are Cherry Bomb, Violet Brocade, Blue Blitz, Atlantis Burst. I squeezed a little powder into a watercolour palette pan, and picked up the colour with a wet paintbrush. A very easy way to watercolour!

I spritzed the panel with a little shimmer spray and some white gouache splatter.

The Sketch Challenge was set out with four panels to the bottom right of the card and a sentiment strip. Rather than colour four different images, I cut my panel into four – carefully removing a strip from the vertical centre and then horizontally on each of the resulting panels – all the while ensuring the image was not distorted. Many pencil marks and ruled lines on the back of this!

I die cut a further stitched rectangle to mount the pieces back together with foam tape for a little bit of gentle dimension.

The card base itself is Strathmore Bristol Smooth cardstock – it is a warm creamy colour and I find it matches very well in tone with the watercolour cardstock I use. You can also use Tim Holtz watercolour paper which is a much brighter white which matches with Neenah cardstock much better.

I felt the card base itself needed a little lift, so I white heat embossed a large background stamp, Flower Fields.

This gives the card a little interest without detracting from the focal image.

I heat embossed a sentiment, using Happiest of Birthdays from the More Essential Sentiments set and placed the strip towards the bottom right. A few wee Studio Katia pearls finishes off this pretty card.

You can enter this week’s Sketch Challenge too – click here to visit the My Favorite Things blog with all the details.

If you’ve never shopped directly with MFT before, you can click here to get $10 USD off your first purchase!

This completes my pretty card today. Thank you for stopping by! Below are links to the products I have used – some are affiliate links (not all) which simply means I may get a small commission at no extra cost to you when shopping. Thank you for your support – it means I can keep creating and sharing with you.

For more in-depth information about the best value supplies for your craft table, from cardstock to the handiest tools, check out my Best of the Basics series.

Follow me on my social media channels:

Posted on 6 Comments

Color Hues Challenge – Red & Grey

I’m always a bit slow when it comes to entering card challenges – last year I think I only entered ONE! I will try to do better this year hahaha.

I noted a friend had entered a card in this Color Hues Challenge and I was inspired to try it out for myself. Red and Grey – couldn’t be too difficult right? Well. 5 different things cut out, coloured, inked etc and I was no closer to completing a single card than when I started!

You can enter here too – this challenge closes on January 14, 9am (EST)
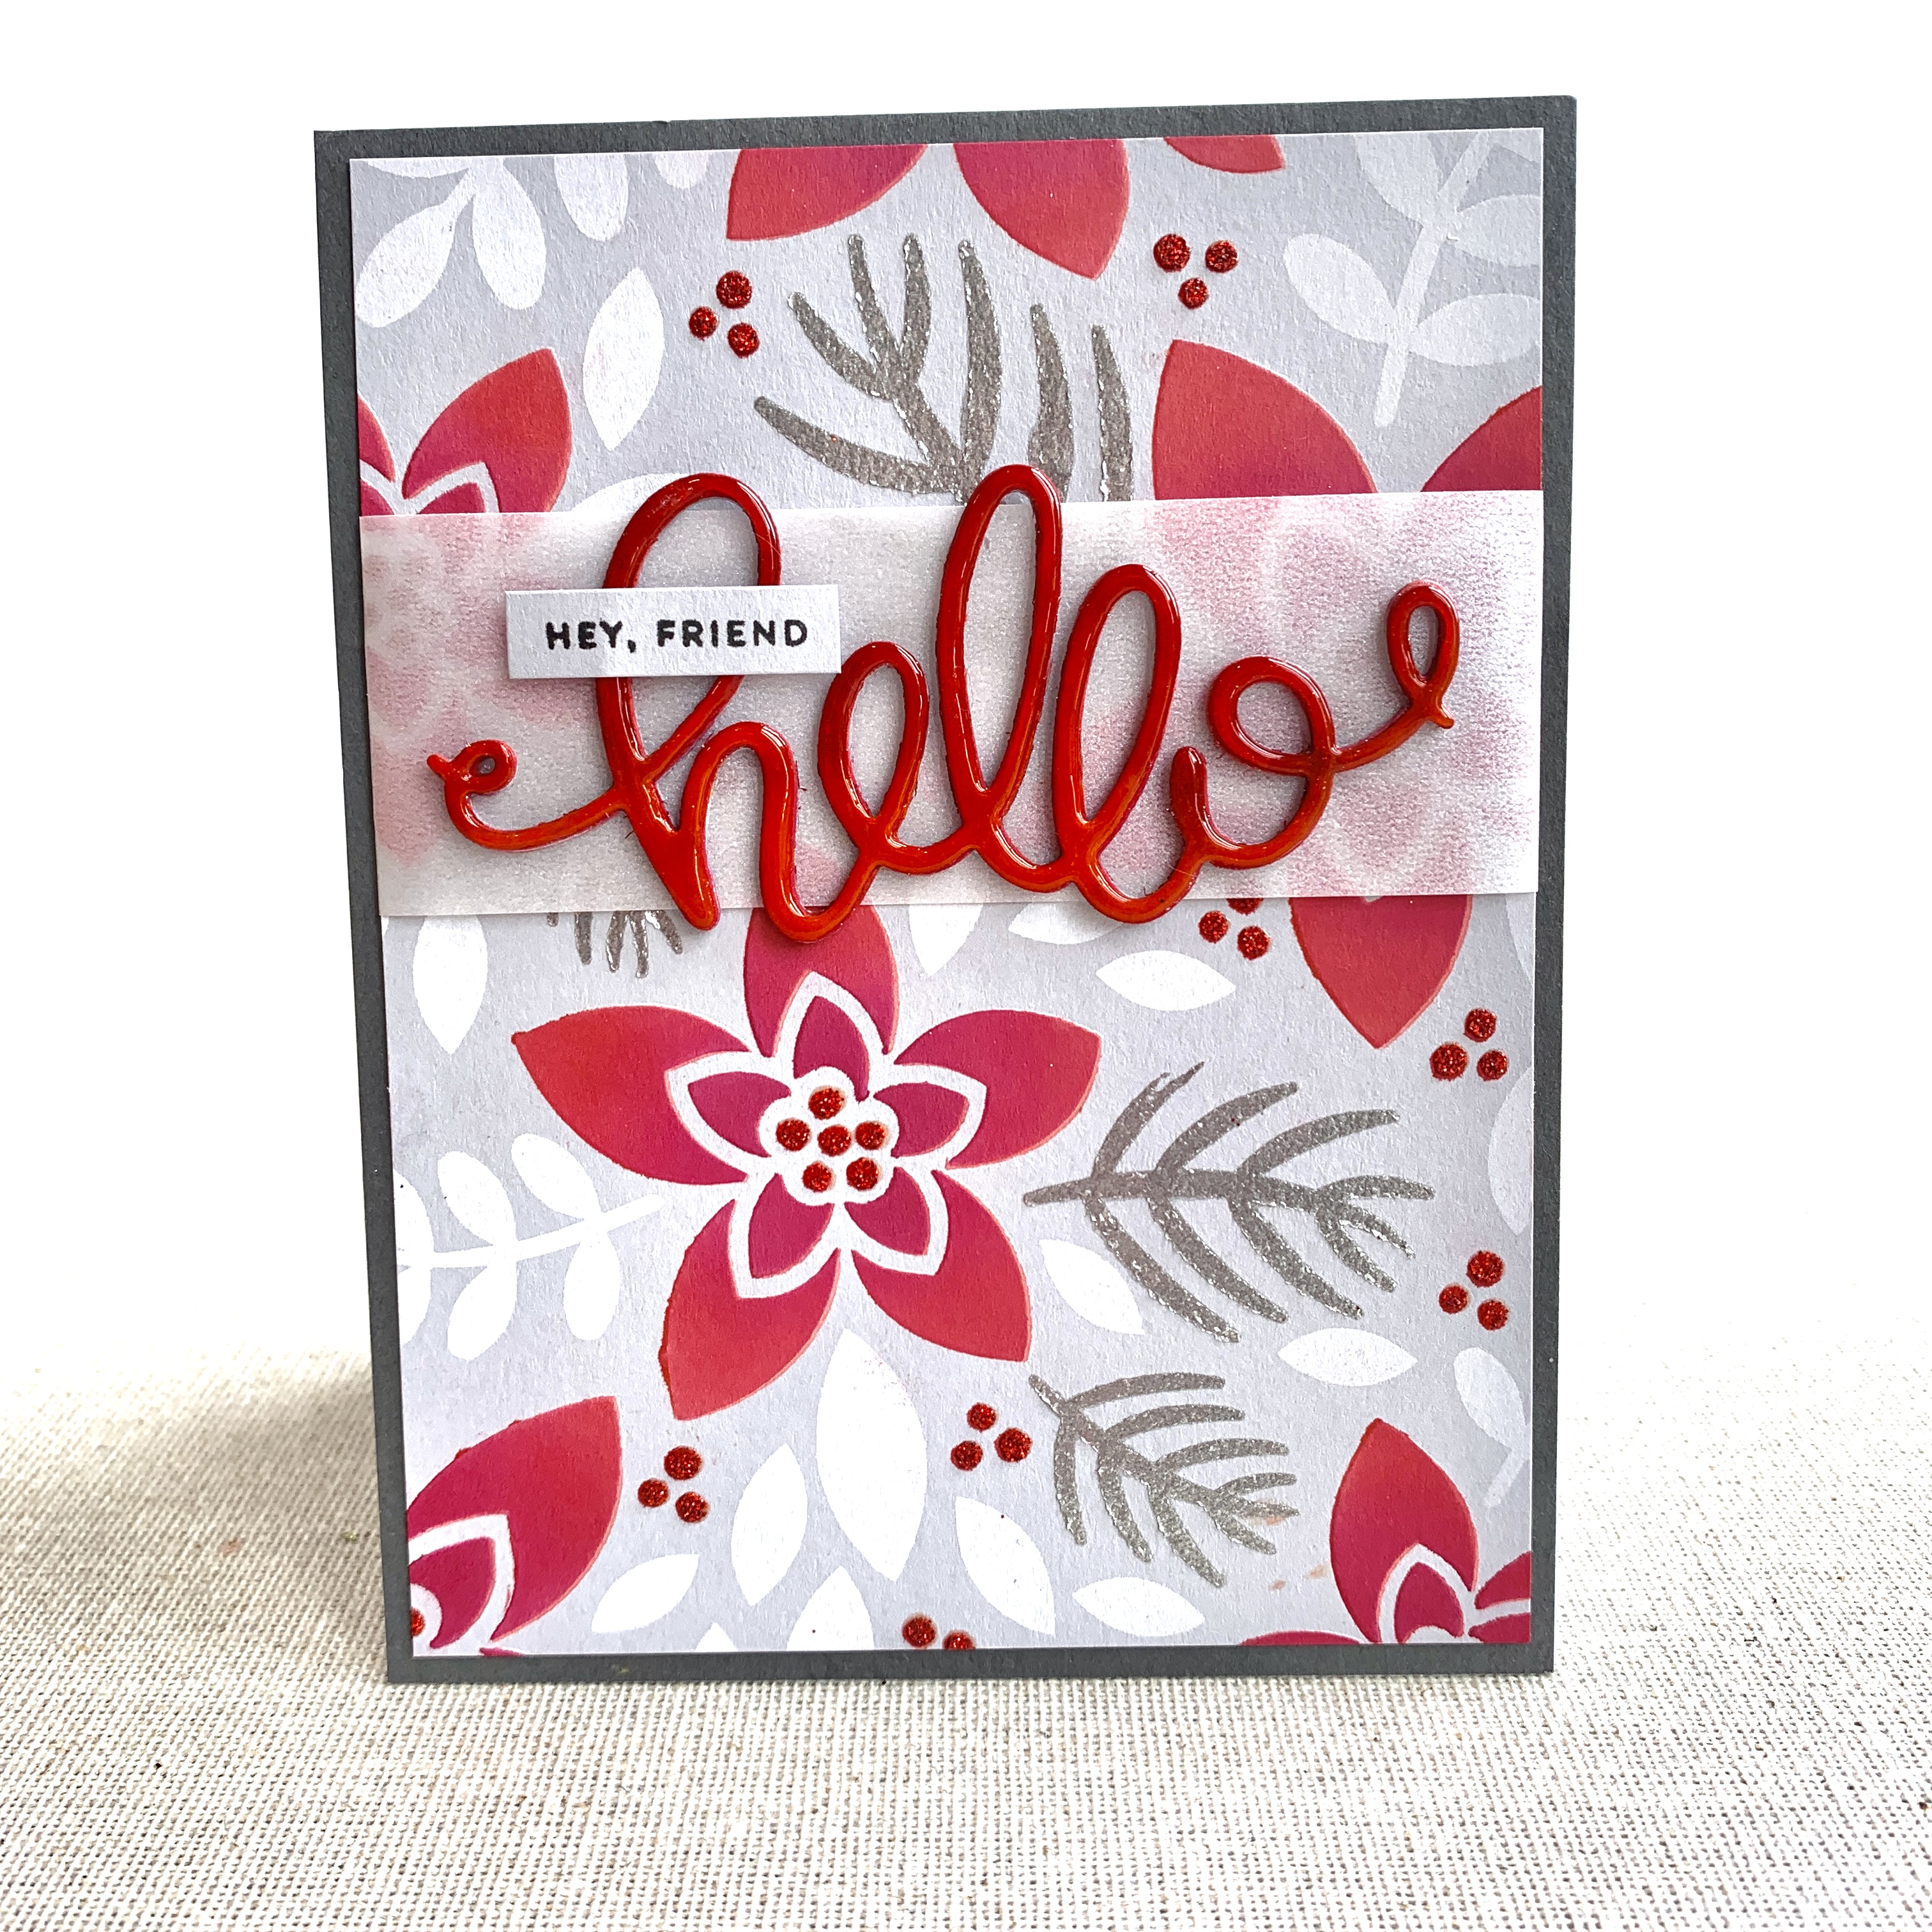
Hello Friend Card

I finally settled on this – a card using the Simon Says Stamp layered stencil set. The stencil set is so cool, I saw it featured on Jennifer McGuire’s blog and promptly ordered it – and of course it has sat in my stencil box for over a YEAR without being used! So this challenge fulfils another of my personal challenges, to USE my stash.

I started off with Gina K Designs Soft Stone cardstock, which is a soft, pretty grey. I used my cute little Concord and 9th mini inks in both Poppy and Cranberry for the flowers, Hero Arts Unicorn White Pigment ink for one of the leaf stencils and Silver Glacier paste for the other leaf stencil. I used Nuvo Red Glimmer paste for the berries layer. I was really happy with the final result. I cut down the panel to around 4″ x 5.25″.

To finish, I stacked the Gina K Designs Hello die a few times, inking up the top layer with the Concord and 0th inks again, added shimmer and a generous layer of Nuvo Morning Dew crystal drops for shine. This is placed on a strip of Platinum Vellum stretched across and a little sentiment from Simon Says Stamp Tiny Words.

I felt it needed a little lift with a darker grey, and I used Lawn Fawn Narwhal as a mat layer behind, which is then adhered to the card base.

Birthday Card

I was still having a play with the colour way, and ended up creating this fun birthday card using the MFT Birthday Cake die set.

I cut the pieces out of red, grey and white cardstocks and played out with it until I had it in layers that I liked. I created a panel with Gina K Designs Soft Stone cardstock, heat embossed with the MFT Numbers background stamp and placed on a darker grey cardstock. This time, I used a cardstock from my local stationery store, called Wrought Iron.

The big Birthday is from Hero Arts and I die cut it and stacked it a few times with a black glitter layer on top. The tiny Happy Birthday is from the Simon Says Stamp Tiny Words Birthday set. The card base is a dark red, Gina K Designs Red Velvet.

This completes my Color Hues Challenge today. Thank you for stopping by! Below are links to the products I have used – some are affiliate links (not all) which simply means I may get a small commission at no extra cost to you when shopping. Thank you for your support – it means I can keep creating and sharing with you.

Follow me on my social media channels:

For more in-depth information about the best value supplies for your craft table, from cardstock to the handiest tools, check out my Best of the Basics series.

Posted on 3 Comments

Cute Hedgehog Gift Tag

You can find more of my Christmas Gift Tags from over the years by checking out #inkyandstampytags on Instagram, or my dedicated Pinterest board

Last year I made many many gift tags – and as a result, I have a box full of little projects that never came to fruition. This is one of those. I had stamped and cut the hedgehogs using Copic X-Press It cardstock, and coloured the hats, but that’s as far as I got :/

Inspiration hit finally! I decided to go with a Kraft and rich red colour scheme. I used scraps I had in my craft room from my local stationery store, but Gina K or Lawn Fawn cardstocks would be comparable and I have linked to those at the end of this post.

I chose the MFT Treat Tag because the hedgehog is quite a large image. I wanted to frame him somehow, and decided on the delicate frame in the Concord & 9th Just Because die set.

To get the gold heat embossed background in the right place, I created a mask tag out of scrap cardstock by cutting the frame out where I wanted it placed. I used my little MISTI to stamp and heat emboss the MFT background stamp, Christmas Words.

I completed colouring the hedgehog images – copics used are:

  • Red: R59, R29, R27, R24
  • Green: G28, G09, G05, G14
  • Grey: W9, W7, W5, W3, W0
  • Skin: E21, E00, E000

To feature him in the frame, I carefully fussy cut out the stocking up to his fist, and trimmed the bottom of the stamped image off. It now sits flush directly on the bottom of the red frame.

Before adhering the framed hedgehog to the tag, I added fluff to the hat with Tsukeniko Radiant Neon Amplify in White – a very effective puffy paint! This stuff puffs up tremendously when heated with the heat gun and STAYS white, giving a lot of dimension.

I glued the frame to the tag, where it fits over the gold heat embossing perfectly

For the finishing ribbon, I added a wide red ribbon found at my local emporium store. It has No Peeking printed on it, and I thought the tone suited the cute image. I used gold ornament cord to secure the wide ribbon, and tied it in a bow.

Finally, the To and From is stamped at the bottom in black, and this stamp is from the Scrapbook.com Gifting and Tag Sentiments – there are three other To & From stamps to use on other gift tags too, plus some other fun sentiments designed for gift tags.

This completes my little gift tag today. Thank you for stopping by! Below are links to the products I have used – some are affiliate links (not all) which simply means I may get a small commission at no extra cost to you when shopping. Thank you for your support – it means I can keep creating and sharing with you.

https://linkdeli.com/widget.js?id=f5e8378456858c916708

You can find more of my Christmas Gift Tags from over the years by checking out #inkyandstampytags on Instagram, or my dedicated Pinterest board

For more in-depth information about the best value supplies for your craft table, from cardstock to the handiest tools, check out my Best of the Basics series.

Posted on 1 Comment

A Beary Christmas Tag

You can find more of my Gift Tags from over the years by checking out #inkyandstampytags

Each year I like to make Christmas Gift Tags as gifts for teachers and other support people important to our family.

I actually stamped and die cut these bears last year, intending to create a tag for my 2019 collection – but creator’s block got in the way! So I sat and stared at them for months. I had coloured just the bears thinking inspiration would come, but every tag idea, colour combo, sentiment match, just didn’t do it for me. So they sat in the box and I told myself this was OK. Didn’t make it any less stressful :/

It’s interesting what a difference a year makes in terms of crafting skill and ideas! I was disappointed with my bear colouring efforts from the year before and had a go at re-colouring them. As a result, I have ended up with darker bears than I’d usually like, so I paired them with deep rich red and emerald green tones for the gift box. The following photos show you which Copic markers I used.

The tag itself was masked off with a strip of post-it tape along the bottom, and I heat embossed the MFT Christmas words background stamp in White Satin Pearl embossing powder.

I stamped the sentiment along the bottom of the tag, and popped the bear on top with foam tape.

I added Glaze details to the eyes and nose of the bear to finish them off.

I added a further mini tag from the MFT Tag Builder 5 with a To & From and tied the two tags together with red and white thick Baker’s twine.

Such a simple tag after a full year of agonising!

This completes my cute gift tag for today. Thank you for stopping by! Below are links to the products I have used – some are affiliate links (not all) which simply means I may get a small commission at no extra cost to you when shopping. Thank you for your support – it means I can keep creating and sharing with you.

This completes my little gift tag today. Thank you for stopping by! Below are links to the products I have used – some are affiliate links (not all) which simply means I may get a small commission at no extra cost to you when shopping. Thank you for your support – it means I can keep creating and sharing with you.

https://linkdeli.com/widget.js?id=f5e8378456858c916708

You can find more of my Gift Tags from over the years by checking out #inkyandstampytags

For more in-depth information about the best value supplies for your craft table, from cardstock to the handiest tools, check out my Best of the Basics series.

Follow me on my social media channels: