You can find more of my Christmas Gift Tags from over the years by checking out #inkyandstampytags on Instagram, or my dedicated Pinterest board
OK, I definitely went out of my usual comfort zone for this tag – not only are there no foxes here in New Zealand, I also strayed away from my favourite traditional Christmas colours by using the Burnt Orange. Luckily gold goes with practically everything!

This tag really is a simple one – mostly die cutting using products from Honey Bee Stamps, Taylored Expressions and Lawn Fawn.
I chose to use watercolour cardstock, even though I didn’t paint anything, because I like the natural texture.
I have listed all products used at the end for your reference.


The Taylored Expressions Little Fox has two dies – one for the fox body and the other for the white accents – it cuts the two cheeks, nose and tip of the tail at once. I went through my scrap folder (click here to see how I organise my cardstocks and coloured scraps) and chose some burnt orange and cream cardstock. I did not worry about trying to colour those teeny weeny eye pieces, rather filled those tiny gaps with black Nuvo drops. I did colour the nose with a black copic marker.


I wanted my gift tag to have a little bit of a difference to all my others, and decided the Honey Bee Stamps tag set with a vellum centre layer would be just the thing. I realised two things through trial and error. One, best to stamp and heat emboss any images first, so I put his wee gift a little to the left, plus the To/From and my logo on the back. Two, liquid glue was difficult to get a smooth finish on the vellum, but Gina K’s adhesive dot roller worked best to adhere both white circles on either side of the vellum.

The little gift is from a discontinued Lawn Fawn gift tag stamp set – but search your stash for a suitable little gift image.
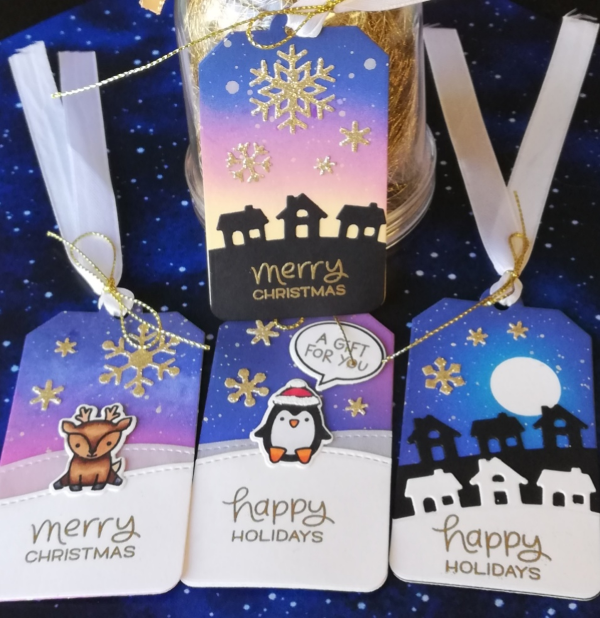
FYI: the tag die is still available, and was used in my Christmas Gift Tag Class – Night Skies Ink Blending.


I used the Large Lawn Fawn Wreath to cut the greenery sprigs from scraps of green cardstock found in my stash, and placed them leading out to the right. The little fox is adhered on top using little foam squares and liquid adhesive. I cut the bow from the Lawn Fawn Wreath set out of Gold Vellum and put it together using Glue Dots. A Glue Dot secures the bow to the top of the tag nicely.

I searched through my Christmas sentiment stamps – I do have all my Christmas stamps stamped out into a binder, making this easy to flick pages to find the perfect sentiment to fit. You can view my stamp storage and binders here.
I white heat embossed the sentiment onto black cardstock and cut them as thin as I dared! The sentiment strip was placed with a foam adhesive strip directly beneath the fox and the gift.
I finished the tag off with Lawn Fawn Gold trimmings.
This completes my cute little gift tag today. Thank you for stopping by! Below are links to the products I have used – some are affiliate links (not all) which simply means I may get a small commission at no extra cost to you when shopping. Thank you for your support – it means I can keep creating and sharing with you.
 https://linkdeli.com/widget.js?id=f5e8378456858c916708
You can find more of my Christmas Gift Tags from over the years by checking out #inkyandstampytags on Instagram, or my dedicated Pinterest board
For more in-depth information about the best value supplies for your craft table, from cardstock to the handiest tools, check out my Best of the Basics series.

You can check out how I store my stamps and dies, inks and cardstocks.
Follow me on my social media channels: